Previous Topic

Next Topic

Book Contents

Book Index

Step 2 - Course Only Installation

After selecting Course Only Installation, the courses available for installation appear in a color-coded list that indicates its status. These are the courses you downloaded and added to the \courses folder:
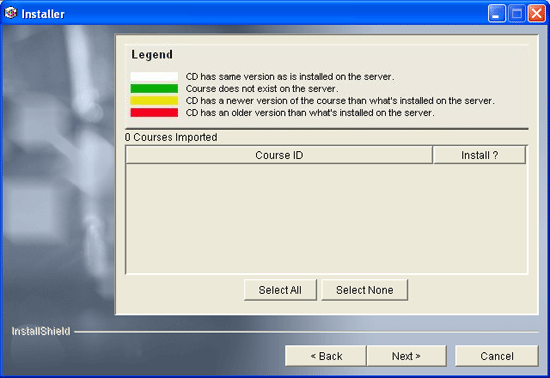
Installer 3

The status options are as follows:

Color

Status

Green

The course in the \courses folder is NOT on the server (default=selected).

Yellow

The course in the \courses folder is NEWER than the version on the server (default=selected).

Red

The course in the \courses folder is OLDER than the version on the server (default=not selected).

No Color

The course in the \courses folder is the SAME as the version on the server (default=not selected).

Note: You are no longer required convert e3 courses using Content Installer.

To install courses:
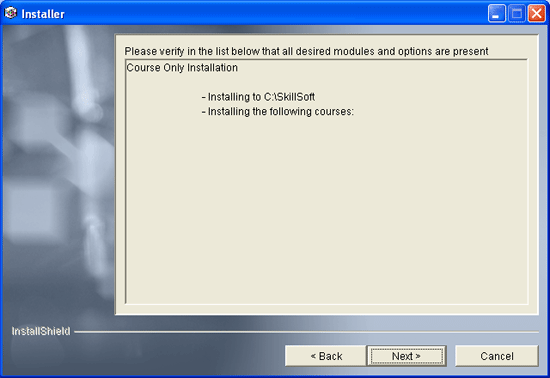
  1. Click the check boxes next to the courses you want to install, and click Next. You can also use Select All or Select None.
  2. Verify that the list of selected courses is correct, and click Next.

    Installer 4

  3. If you are not satisfied with the selections and want to change them, click Back and change the appropriate options.
  4. The Installer installs the selected software to the content server directory that you selected.
    A log file is created in the /Logs folder of your content server directory (format: Installer_yyyy-mm-dd).

    Note: If prompted, click the Yes button or the Yes to All button to overwrite any existing files.
  5. Click Finish to exit the installation program.
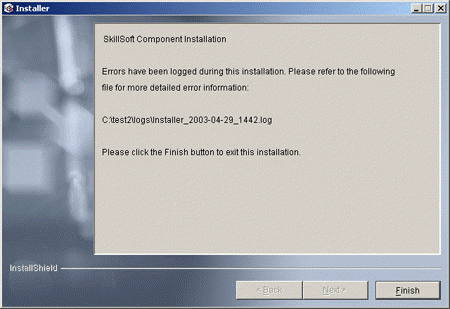
  6. If your installation encountered errors, a screen similar to the one shown below will appear:

    Errors Screen

  7. Click Finish to exit the installation program.
  8. Print out the log file and save electronic copies.
  9. Contact the SkillSoft Online Customer Support site at http://onlinesupport.skillsoft.com.