Create a New Custom Area
Prior to working with custom areas and subjects, see Area and Subject Best Practices.
When you create a custom area, you choose where in the library it displays. You can choose either the standard menu category, Skill Areas, or a custom menu category, that you define yourself.
To create a new custom area in your library
-
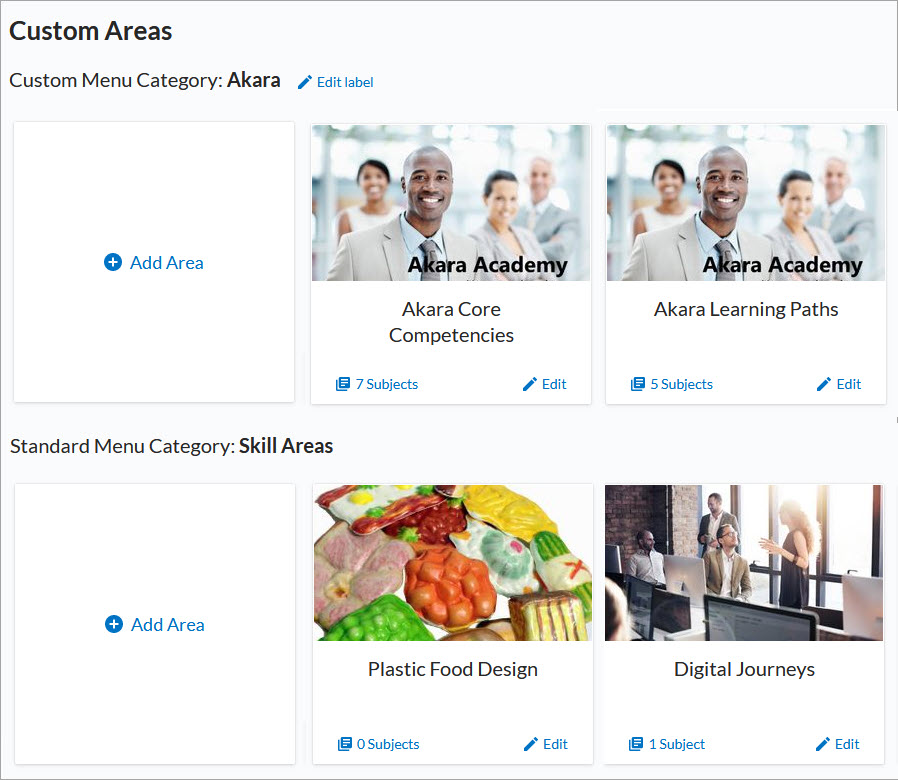
From the left navigation bar, select Content > Areas & Subjects. The Custom Areas page displays. The page is broken into two sections, one for the custom menu category you defined, and one for the standard menu category, Skill Areas.

- Select + Add Area from either category section. The Add Custom Area page displays.
- Select as many languages where this area will show to learners when their site language matches the area language. For each language you select, you have to add a translated title and description. All other settings including the image are static for all languages. You cannot save the area until all information is saved for all languages selected.
- Enter an Area title. This displays in the library to your users. If you selected multiple languages, change your language from the drop down and enter a translated title for each language you selected.
- Enter a Description. This displays in the library to your users. If you selected multiple languages, change your language from the drop down and enter a translated description for each language you selected.
- Select the Menu Category. The menu category selection defaults to the name of the section where you selected Add Area.
- Skill Areas: if chosen, your custom area displays alphabetically within the standard menu category, Skill Areas, of the library list. You can rearrange the order after you save the area.
- Custom Menu Category: if chosen, your custom area displays alphabetically in a new section in the library listed above the Skill Areas section. If you do not see a custom category in the list, you can add it from Settings >Engagement and Notifications > Email Settings.
- If you select Add area from the Custom Menu Category section, and your area language matches a defined Custom Menu Category language, you see that category language in the drop down list. If you do not have a Custom Menu Category defined for the language of the area, the default category is in English.
-
Review the default setting:Show activity data related to this area and its related subjects and channels in the Skills Activity Dashboard
-
If selected, activity related to the custom area and its subjects and channels appears in the Skills Activity Dashboard.
-
If unselected, activity related to the custom area and its subjects and channels does not appear in the Skills Activity Dashboard.
-
- Choose an image.
- The image displays on the Browse library page.
- Images must be uploaded to Percipio in a 16x9 aspect ratio.
- The recommended size for the image is 1920 x 1080px, with a file size of no more than 300k.
- A .jpg format is preferred, but you can upload .jpg, .png, and .gif files.
- If you do not have a custom image, you can select a royalty-free one from the image gallery or use the default Percipio image.
- Select Publish. If you selected multiple languages, you must specify a translated title and description for all languages before you can publish.
- The new custom area does not display in the library until you create a custom subject and add channels or journeys to it.