Bulk Add or Update Audiences
If you have many audiences to add or update, you can use the bulk process. For this process, you complete a CSV file and upload it. You can add and update audiences in the same file.
Before you Begin
Before you begin with the bulk add or update of audiences, keep the following in mind:
- You must know the values of the user attributes you want to include, they are not case sensitive, but spelling must be exact.
- Every audience must have at least one owner.
- If you are entering users as members, owners, or administrators, you must use the Skillsoft platform User ID or their platform email address.
- Separate values and names with a comma, no spaces.
- If you are updating an audience and you are entering users as members, owners, or administrators, what you enter overrides what might already exist for that audience. If you want to keep existing members, owners, or administrators, you must enter their User IDs in the CSV file in addition to the new names. If you leave an existing user off the list, they are removed.
- If you enter users as members separately in the Additional Users column, they do not have to meet the attribute conditions to be added.
- If you want to create child audiences, the parent audience must either already be created or added in a row above the child audience.
- We do not recommend that you batch upload audience owners or administrators to audiences generated by team automation because the automation updates daily and will remove any batch added owners or administrators.
Get started
To bulk add or update many audiences at once:
-
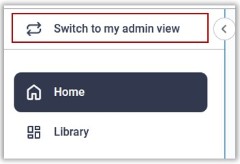
Ensure your left navigation is in the admin menu view. To get there, select Switch to my Admin View. If you see Switch to my Learner View, that means you are on the admin view.
- From the left navigation bar, select Users > Audience Management.
- Select Bulk import audience.
- Download the template, fill it in, and save it as a CSV file. The file size must be under 300 KB.
- Browse to your CSV file and upload it.
- Select Next: Validate data. The platform scans the CSV file and checks to ensure all values are valid.
- If the scan reports errors, you must fix them before you can continue. If the scan passes your CSV file, select Import audiences to continue. To fix your errors:
- On the Validation results page, select Download log report.
- Open the log report. This is a copy of your CSV file with a new column all the way to the right called Error.
- Scan the Error column. The error is notated. Fix any columns with invalid data, such as a user's name, or a misspelling of a user attribute.
- Delete the error column and re-save the CSV file.
- Re-upload the CSV.
- After you import audiences, you see the Import results page. On this page, you see what audiences were created and the total users per audience. Select Next: Finish.
- From the final summary page, select View all audiences to return to your full audience list.
CSV Values
The following fields are available as part of the CSV template file when bulk importing audiences.
| Column name | Accepted Values |
| Audience name* |
Enter a name for your audience. We recommend defining a naming convention so all site admins viewing the list of audiences understand the list. If you are updating an audience, enter the existing name in this column. A value in this column is required. |
| Owners* |
Enter the Skillsoft platform User ID or email ID of anyone who should be an owner of this audience. Separate each ID by a comma, no spaces. This field is required. If you are updating an existing audience, any ID's that you specify in this column replace any existing owners. If you want to keep an existing owner or add a new one, enter their ID. If you want to remove an owner, omit their ID. An audience owner is a user with the role of manager or learning admin assigned to one or more audiences. The manager or learning admin can access analytics about how users in their audience engage with the platform. Owners who are learning admins can also create, edit, and manage assignments for users in their audiences. When an owner is added to or removed from an audience, the platform may send them an email notification. |
| Administrative Owners |
Enter the Skillsoft platform User ID or email ID of anyone who should be an audience administrator. Separate each ID by a comma, no spaces. If you are updating an existing audience, any ID's that you specify in this column replace any existing audience administrators. If you want to keep an existing administrator or add a new one, enter their ID. If you want to remove an administrator, omit their ID. Audience administrators can create and manage child audiences which are subsets of the main audience that they administer. They must be a learning admin or manager with the Manage child audiences as an administrator permission enabled. They cannot change the characteristics of the audience they administer, only the child audiences they create. An audience administrator has all the privileges of an audience owner. |
| Additional Users | If this audience needs to include users who are not part of a user attribute collection, you can enter their User ID's or email ID in this column. Separate each ID by a comma, no spaces. If you are updating an existing audience, any ID's that you specify in this column replace any existing members of the audience who are not part of an attribute grouping. If you want to keep an existing user or add a new one, enter their ID. If you want to remove a user, omit their User ID. If you are only specifying users and not attributes, you do not need to add an Audience Rule. |
| Parent Audience Name |
If you want this audience to be a child audience, specify the name of the parent audience here. If the parent audience does not yet exist, you must either create it first, or also include it in the CSV file in a row prior to the child audience row. |
| User attributes |
Each user attribute you have defined in the platform is shown as a column. Specify the value in the column to include all users who have that value in the audience. If you want an audience to include users from across different values of one attribute, separate each value with a comma and no spaces. When you specify multiple values, you include every user who has one of those values specified. It acts like an OR. For example, if you want your audience to include users from both the Finance and Engineering departments, in the Department column, specify If you are just specifying one attribute, you must add that attribute name in the Audience Rule column by itself. |
| Audience Rule |
If you want to be more granular in your audience selection, you can specify an AND rule between multiple attributes. In this column enter the attribute name followed by a space, then the word AND and another space, followed by the second attribute: For example, if you want anyone from the Finance or Engineering Department in only the US Geography, you would first specify these values in each attribute column, then you would add them together in the Audience Rule column: Department AND Geography. If you only have one attribute specified, you must add the attribute name in this column. If you only have Additional Users specified and no attributes, you can leave this column blank. |
| Error |
This column only displays if the validation fails. Use this to see which rows contain invalid information. The error indicates which column has incorrect values. Fix the errors, remove the error column, resave as a CSV, and re-upload to continue the bulk import process. |
* Required field