Update Existing Users by Bulk Import
If you want to make a change to multiple users, for example, change them from active to inactive or populate a new user attribute, you can use the bulk import feature.
To update a single user, see Edit an Existing User.
Creating the CSV file for importing
When creating a CSV file for changing user data, the only columns you need to specify in the CSV are the externalUserID and the columns for which you want to add or change data. The externalUserID corresponds to the User ID field in the platform and is configured at the time of user creation, along with the loginName. It should not be confused with the User UUID, which is automatically assigned by the system for each account and cannot be used in bulk imports for updating existing users.
When you ensure all other columns are removed from your file, you avoid any accidental data overwrites.
Updating the data
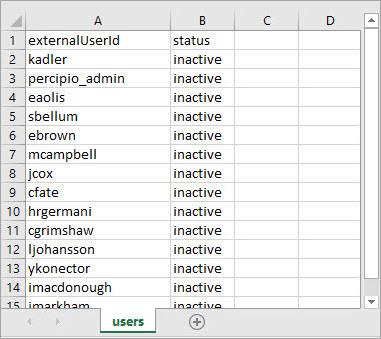
The best way to get the externalUserID for each user and exact column heading titles is to download the current user list.
- From the left navigation bar, select Users > User Management. The User Management page displays.
- Click Download List. A CSV file containing all of your users and their user profile data downloads.
The downloaded list contains a row for each user and a column for each user profile and custom user attribute. To update this file with changes:
-
Sort and filter the columns to group users together. Delete any rows that contain users you do not want to update.
-
Delete any columns that contain data that you do not want to update.
-
Update the data in the remaining columns. If you leave a column blank, the platform will populate it using system defaults or if it is a custom attribute, the platform will remove any existing data. See CSV fields and accepted values for how to specify data in columns.
-
Save your file.
If you have a list of user ID's that need to be updated, you can copy them into the downloaded import template.
- From the left navigation bar, select Users > User Management. The User Management page displays.
- Click Download Template. A CSV file containing all user attributes downloads.
The downloaded template contains a column for each user profile and custom user attribute. To create your file for uploading changes:
-
Copy user ID's into the externalUserID field.
-
Delete any columns that you do not want to update.
-
Add data in the remaining columns. If you leave a column blank, the platform will populate it using system defaults or if it is a custom attribute, the platform will remove any data. See CSV fields and accepted values for how to specify data in columns.
-
Save your file.
To update many existing users via a bulk import
- On the Users > User Management page, click Bulk import users.
- Click the IMPORT tab.
- Choose the file you want to import and click Open. The platform conducts the following checks on the import file:
- File format (CSV)
- Authorized separators: a comma (,) a semicolon (;) and the Tab function.
- Empty file
- Maximum size
- CSV field values
- Select the date and time you want to send the initial Welcome email. Note: The date and time are based on your local system settings, not the email recipients' settings.
- Click Import.
- View the bulk import reports.
Impact of changing a user's attributes
Adding or removing user attributes from a user's profile can impact that user's entitlements impacting the content that they see on the platform and their assignments.
- If you remove a user attribute value, the user is removed from any audiences defined by that attribute value. The user also loses access to the content targeted to the audience such as promotions, custom channels, and custom journeys. If the audience is also associated to a license distribution, users will lose content entitlements unless they already consumed a license, in which case they retain that license until the license resets on the rollover date.
- If you add a user attribute value, the user is automatically added to any audiences defined by that attribute and associated value. The user gains access to the content associated to those audiences. Upon the next sign in to Skillsoft Percipio Platform, the user consumes a license for that license pool and sees any targeted content such as promotions, custom channels, and custom journeys.
-
If users get removed from an audience because you change one of their attribute values and that audience has an assignment associated with it, the users automatically receive an assignment cancellation notification.
-
If users get added to an audience because you change one of their attribute values and that audience has an assignment associated with it, the newly added users receive an assignment notification.
- When you add a user to an audience that has a Scheduled assignment, the assignment displays on the user's Assignment page on the start date. Scheduled assignments have a start date in the future.
- When you add a user to an audience after the start date, the user receives an email notification and the assignment displays on their Assignment page immediately. In Progress assignments have a start date in the past.
- The time to complete the assignment depends on how you configured the assignment. If you configured the assignment with a fixed date, the user sees the fixed date, which could be past due. If you configured the assignment with number of days, the user has the same number of days as all other users to complete the assignment.
An assignment has the Number of days to complete set to 30 and a Start Date of September 1.
Jane Doe was part of the original audience, so the assignment started for them on September 1st. Jane's due date is September 30th.
John Doe was added to the audience on September 4th, four days after the assignment's Start Date. John's due date is four days later, on November 4th.