Workspaces
Workspaces are made up of users in your organization. Before you begin creating content, you need to choose your workspace. When you first access LX Design Studio, you are given access to a shared organizational workspace and a personal space. Everyone serves as the owner of their personal workspace. If you are an admin of LX Design Studio, you will be an owner of the shared organizational space. If you are not an admin of LX Design Studio, you may be a viewer or editor of the shared organizational space.
Workspaces are where you can create and manage projects. To switch between workspaces, use the drop-down at the top of the left navigation bar.
Best practices for workspaces
When choosing which workspace to create content in, remember that:
- Only you can see the content you create unless you invite others to collaborate. Even if you create a project in a shared workspace, you still have to invite collaborators in order for them to see it.
- When you add collaborators to a project, they are automatically added to the workspace where the project is located.
- You may want to reference the knowledge sources from a specific workspace. Workspaces contain knowledge sources that your Design Assistant uses to create content that fits your organization's standards. Your different workspaces may contain different knowledge sources that are relevant to certain projects. The Design Assistant can recommend knowledge sources that would be relevant and useful. In addition, when you upload knowledge sources, the Design Assistant can use them to answer queries. For more information on adding knowledge sources to a workspace, visit the Knowledge Sources page.
- The organizational workspace has full publishing privileges to all audiences including the All Users audience. You can restrict specific users with publishing privileges from publishing to the All Users audience.
- Only site admins can change the publish settings for workspaces.
- The content you add to the Knowledge Sources and Media Library are available to all content in that workspace.
Workspace roles
If you are a site admin of the platform and have the privilege to access LX Design Studio, you also have admin level permissions to LX Design Studio. As an admin of LX Design Studio you can see and manage all workspaces and projects from the Admin dashboard.
If your platform role is something other than site admin, and you have privileges to LX Design Studio, you are not an administrator in LX Design Studio. You are the owner of your default workspace and those you create, but you can only access other workspaces and projects to which you have been added as a member. When you are added as a member, you may have view or edit privileges.
If you are not an administrator in LX Design Studio, you may have a different role in different workspaces. The role you have at the project level is independent of your role within the workspace. The following roles exist in workspaces:
- Viewer: A workspace viewer can see shared projects in a workspace, but they cannot create projects, but can create content. Viewers cannot manage members, delete, or rename a workspace.
- Editor: A workspace editor can see shared projects in a workspace. They can create new projects and new content in a workspace. Editors cannot manage members, delete, or rename a workspace.
- Owner: An owner has full control over a workspace and the projects and content within it. They can manage members, delete, or rename the workspace. Owners cannot change the publish settings of a workspace, only site admins can do that.
Depending on your role in a workspace you may have different options available to you with regards to managing a workspace.
- As a viewer, you can:
- As an editor, you have all the abilities of a viewer plus you can:
- As an owner of a workspace, you have all the abilities of a viewer and an editor plus you can:
Find a workspace
Before you begin creating projects and content, ensure you are in the correct workspace. By default, your personal workspace is the active one.
To switch to a different workspace:
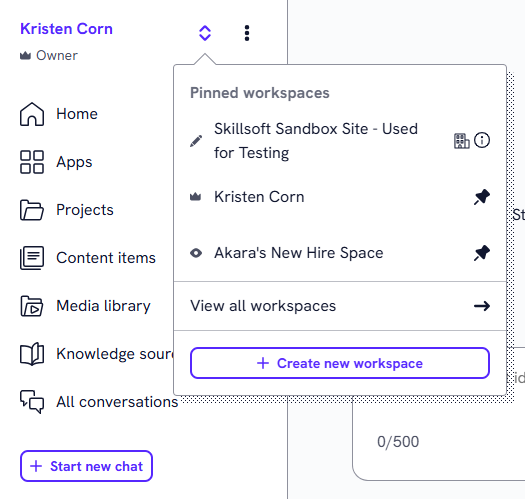
- Open the workspace dropdown. The dropdown is indicated by the up and down arrows to the right of the workspace name.

- You see a list of pinned workspaces to which you have access. Scroll and select the one you want from the list. If you do not see the workspace you want from the pinned list:
- If you are not an LX Design Studio admin, select View all workspaces. You see a list of all workspaces to which you have access. Scroll the list and select the one you want. If you have more than 20 workspaces, you can search for the one you want.
- If you are an LX Design Studio admin, select Manage workspaces. From the Admin dashboard that displays, you can scroll the list and select the one you want or use the Search bar to find it.
Create a workspace
You can only create a workspace if you are an administrator of LX Design Studio. You can do it in one of two ways:
From the left navigation workspace are:
- From the left navigation bar, open the workspaces dropdown and select Create workspace.
- Give your workspace a name.
- Select Create.
-
Choose which users should be members of the workspace. Any user must also have the privilege set on their Skillsoft platform user account in order to access LX Design Studio. If you make a user a member either individually or from an audience, if that user does not have the privilege set on their user account, they won't be able to access LX Design Studio. To add members:
- Select whether you want to add an individual user, Add members, or an audience, Add audiences.
If you are an owner of a Skillsoft platform audience, you can also choose to add one or more audience to the workspace. An audience is a group of users defined in the platform. When you add audiences, you can restrict users to only be able to publish content to that audience. For users of audiences to be able to access LX Design Studio, each user must also have the privilege as part of their Skillsoft platform user profile enabled.
- Start typing the name of the member(s) or audiences you want to add. Select the desired result from the list.
- Choose the level of access you would like the new member to have in the workspace, either Viewer, Editor, or Owner. If you added an audience, every user in the audience has the same level of access.
- Select whether you want to add an individual user, Add members, or an audience, Add audiences.
- The default publish settings for a workspace is to allow users with publishing privileges to publish to all audiences except the All Users audience. If you want to change that to be more restrictive, please reach out to your site admin.
- Select Send invite to notify users that they have been added to the workspace.
From the Admin dashboard:
- From your profile dropdown, select Admin dashboard.
- Switch to the Workspaces tab.
- Select Create workspace.
- Give your workspace a name and select Create. The default publish settings for a workspace is to allow users with publishing privileges to publish to all audiences except the All Users audience. If you want to change that to be more restrictive, you can change the Publish settings.
-
Choose which users should be members of the workspace. Any user must also have the privilege set on their Skillsoft platform user account in order to access LX Design Studio. If you make a user a member either individually or from an audience, if that user does not have the privilege set on their user account, they won't be able to access LX Design Studio. To add members:
- Select whether you want to add an individual user, Add members, or an audience, Add audiences.
If you are an owner of a Skillsoft platform audience, you can also choose to add one or more audience to the workspace. An audience is a group of users defined in the platform. When you add audiences, you can restrict users to only be able to publish content to that audience. For users of audiences to be able to access LX Design Studio, each user must also have the privilege as part of their Skillsoft platform user profile enabled.
- Start typing the name of the member(s) or audiences you want to add. Select the desired result from the list.
- Choose the level of access you would like the new member to have in the workspace, either Viewer, Editor, or Owner. If you added an audience, every user in the audience has the same level of access.
- Select whether you want to add an individual user, Add members, or an audience, Add audiences.
- Select Send invite to notify users that they have been added to the workspace.
Pin a workspace
Pinning a workspace makes it easy to locate and quickly access.
Add a workspace to your favorite or pinned list
To add a workspace to your favorite or pinned list:
- From the left navigation bar, select the workspace dropdown.
- If you are not an admin, select View all workspaces. If you are an admin of LX Design Studio, select Manage workspaces.
- Locate the workspace you wish to add to your list.
- Select the Pin icon. The workspace now shows in your Pinned list.
Remove a workspace from Pinned
To remove a workspace from your Pinned list:
- From the left navigation bar, select the workspace dropdown.
- Locate the workspace you wish to unpin.
- Select the Pin icon to unselect it. The workspace is removed from your favorite or pinned list.
Manage members of a workspace
If you are the owner of a workspace, you have the ability to manage its members. You can add or remove members and change their privileges in that workspace. Viewers and editors cannot see or manage members of a workspace.
All owners can manage members for the selected workspace by selecting the Manage members option from Show options menu. If you are an admin of LX Design Studio, you can also manage your members from the Admin Dashboard.
You can add individual users or audiences. When you add audiences, all users in that audience share the same level of access. When you add members through audiences, you can restrict publishing of content to just those audience through the Publish settings.
Any user must also have the privilege set on their Skillsoft platform user account in order to access LX Design Studio. If you make a user a member either individually or from an audience, if that user does not have the privilege set on their user account, they won't be able to access LX Design Studio.
Add a new member to a workspace
To add a new member to a workspace:
- From the workspace drop down menu, switch to the workspace where you want to add members.
- From theShow options menu
 , select Manage members
 -
Choose which users should be members of the workspace. Any user must also have the privilege set on their Skillsoft platform user account in order to access LX Design Studio. If you make a user a member either individually or from an audience, if that user does not have the privilege set on their user account, they won't be able to access LX Design Studio. To add members:
- Select whether you want to add an individual user, Add members, or an audience, Add audiences.
If you are an owner of a Skillsoft platform audience, you can also choose to add one or more audience to the workspace. An audience is a group of users defined in the platform. When you add audiences, you can restrict users to only be able to publish content to that audience. For users of audiences to be able to access LX Design Studio, each user must also have the privilege as part of their Skillsoft platform user profile enabled.
- Start typing the name of the member(s) or audiences you want to add. Select the desired result from the list.
- Choose the level of access you would like the new member to have in the workspace, either Viewer, Editor, or Owner. If you added an audience, every user in the audience has the same level of access.
- Select whether you want to add an individual user, Add members, or an audience, Add audiences.
- Select Send Invite. The new member(s) is notified that they have been added to your workspace.
Change privileges or remove a member
To change the privileges or remove a member from your workspace:
- From the workspace drop down menu, switch to the workspace in which you want to edit members.
- From the Show options menu , select Manage members.
- Locate the member who's privileges you want to change.
- From the dropdown, select a role, either Viewer, Editor, or Owner, or select Remove member. If you change this for an audience, every user in that audience gets the new setting.
- Confirm your change.
Delete a workspace
If you are the owner of a workspace, you may delete it. In order to delete a workspace, you must first remove all projects it contains.
To delete a workspace:
- From the workspace drop down menu, switch to the workspace that you want to delete
- From the Show options menu , select Delete.
- Confirm by selecting Delete workspace.
If you are an admin of LX Design Studio, you can also delete workspaces from the Admin dashboard.
Rename a workspace
If you are the owner of a workspace, you may rename it.
To rename a workspace:
- From the workspace drop down menu, switch to the workspace that you want to rename.
- From the Show options menu , select Rename.
- Give your workspace a new name.
- Select Rename.
If you are an admin of LX Design Studio, you can also rename workspaces from the Admin dashboard.
Change Publish Settings
Publish settings help reduce the risk of accidental over‑publishing, especially for personal or tightly governed workspaces, while still enabling flexible publishing for organization‑wide learning content.
Only site administrators can configure publish settings for each workspace directly from the Admin Dashboard. Workspace owners cannot modify these publish settings.
The following options are available:
- Publish to all audiences, including All Users: When you select this option, all users who can publish in the workspace can choose any audience including the All Users audience to see the published content. The All Users audience includes all active users on the Skillsoft Percipio platform. This is the default setting for the shared organizational workspace. A site admin can restrict specific users with publishing privileges from publishing to the All Users audience.
- Publish to all audiences, except All Users: When you select this option, all users who can publish in the workspace can choose any audience to see the published content, except that they cannot choose the All Users audience. This is the default setting for personal workspaces.
- Restrict publishing to specific Workspace member audiences (select up to 5): When you select this option, all users who can publish in this workspace can only publish to selected member audiences. You can select up to five member audiences that users can publish to. A member audience is one that has been added through Manage Members for that workspace.
Limiting audiences here may restrict some publishers if their individual permissions don't overlap with the workspace settings. For example if you restrict publishing to five audiences and a publishing user does not have access to those audiences, they will not be able to publish.
- Publish to admins only for curation (content is not available to learners): When you select this option, all users who can publish in this workspace can only publish to the Skillsoft Percipio platform in a state that is not visible to learners. The admin would then need to add the content to a channel or journey and publish that channel or journey for learners to see it.
For the shared organization workspace, you can prevent specific users from publishing content to the All Users audience. This allows organizations to safely delegate broad publishing rights to trusted users without opening them up to everyone.
To change publish settings for a workspace:
- From your profile dropdown, select Admin dashboard.
- Switch to the Workspaces tab.
- Locate the workspace that you want to change the settings for.
- From the Show options menu , select Publish settings.
- Select the option.
- Select Save.
To prevent users from publishing to the All Users audience in the shared organizational workspace:
- From your profile dropdown, select Admin dashboard.
- Switch to the Workspaces tab.
- Locate the shared organizational workspace in the list.
- Select the gear icon to the right.
- From the Publish Settings dialog box, locate the users who should not be able to publish to the All Users audience and remove the check mark to the left of their name.
- Select the option.
- Select Save.