Date Attribute
Use the Date attribute if you want your values to be in a date format (for example, a hire date, a birth date, or a certification date).
Using a Date attribute (example)
You want to capture the hire date of your users, so that you can create an audience of all users hired during your organization's fiscal year. You can also use the audience qualifying operators days after or days before the value in the date attribute to create an audience of learners who are within 30 days of a particular date. Use this when you want new hires to get an assignment 30 days after their hire date, for example.
To do this:
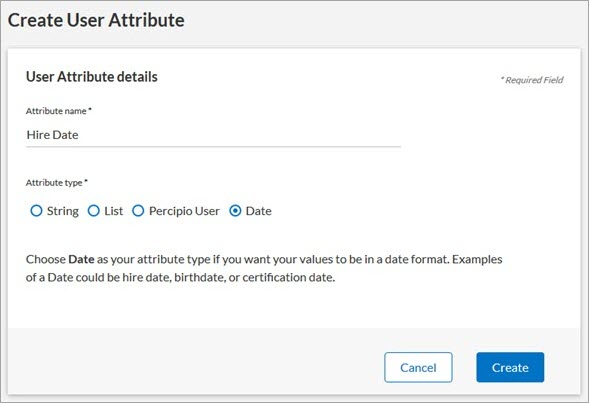
- Create a Date attribute and name it Hire Date.
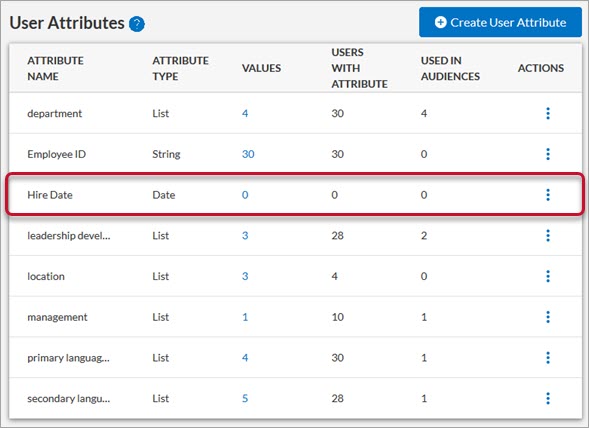
- Once created, the new Hire Date attribute displays on the User Attributes page, but without any values:
-
 Add a Hire Date for an individual user.
- Select Users > User Management from the left navigation bar. Locate the user you want to edit.
- In the Actions column, click
 >
>  . The Edit User page displays.
 - In the User attributes section, in the Hire Date attribute field, click
 .
. 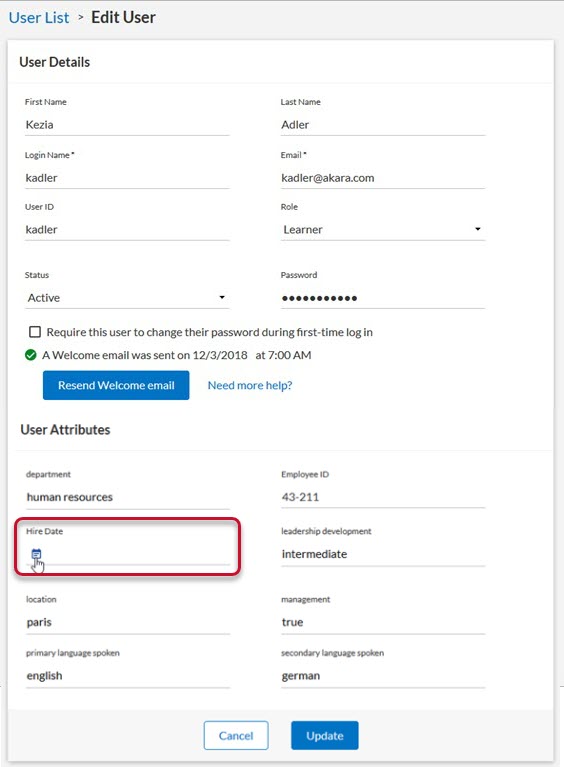
- Select a date from the calendar.
- The selected date becomes a value for the Hire Date attribute.
- Select Update.
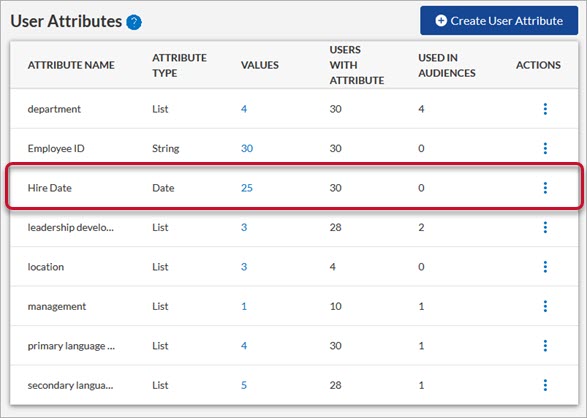
- The User Attributes page updates the Values column:

-
Add a Hire Date for multiple users at once.
- Download a CSV file of your current users.
- For each user, in the Hire Date user attribute column, enter the user's hire date in one of the approved formats:

- Each entry becomes a value of the Hire Date attribute.
- Save and import your CSV file to the platform.
- The User Attributes page updates the Values and Users with Attribute columns:
-
- Create a new audience and name it FY2019 Hires.
- In the Define your audience section, click Add user attributes.
- Select Hire Date user attribute from the Attribute 1 drop-down list.
- Select Between from the Operator drop-down list.
- Enter a start date of the first day of your organization's fiscal year (for this example, we use 01/01/2019).
- Enter and end date of your organization's fiscal year (for this example, we use 12/31/2019).
- Click Done.
- Click Create Audience. You can now create assignments for all users hired during your organization's specified fiscal year.