Create a New Custom Channel
You can create new, customized channels in all supported languages. You can include a selection of custom content, Skillsoft content, or a combination of both.
To create a new custom channel
- From the Admin menu, select CONTENT >Channels. The Custom Channels page displays.
- Click Add Custom Channel. The Create Channel page displays.
- Enter a unique Title for the channel.
-
Note: Titles are required to be unique. If you have already used a title in another channel, the new title here needs to be different.
- Enter a Description. To ensure consistent display to the learner, formatting done to text in the description box may be lost when shown in the Percipio learner interface.
- Choose a background image.
- The background image displays at the top of the channel.
- Channel images must be uploaded to Percipio in a 16x9 aspect ratio.
- The recommended size for the image is 1920 x 1080px with a file size of no more than 300k.
-
If you do not have a custom image, you can select one from the Skillsoft-supplied image gallery or use the default Percipio image.
- Enter a channel source, to inform your learners about who created the channel, or where the content in the channel originated. The source defaults to your organization name.
- Select your area and subject (for library placement) from the Subject drop-down list. You can select either Skillsoft or custom areas and subjects.
- Click Save and add content. The channel page displays.
-
 Add content to the channel.
Modifications to the content selections affect only the selected language view.
- In the channel header, select a language from the drop-down menu.
- On the channel page, add new content:
- Click Add content from library: Search the Skillsoft library for existing content.
- Enter search terms and click
 .
. - Optionally, use the filters to refine your search results.
- Click
 next to the content to add it to the channel.
Note: You can only search content in the language selected in the channel header. If no language options are available to you on the header, search results are in English.You can include a selection of custom content, Skillsoft content, or a combination of both.If using Skillsoft content, ensure your users can view and access it by including them in audiences that are associated with the content license pools.
- Enter search terms and click
- Click Add linked content from another source: The Add Linked Content page displays, and you can create a new external link for your channel. Once created, Percipio returns you to the channel page, with the new external link added to your channel. See Create an External Link for steps.
- Click Add content from library: Search the Skillsoft library for existing content.
- If you added content but want to remove it before saving, click
 .
. - Click Done.
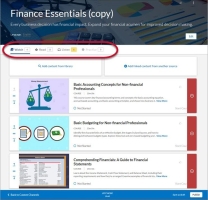
The number of assets in each modality updates in yellow. To see the newly-added content, click the tabs.
-
Remove content from the channel.
Modifications to the content selections affect only the selected language view.
- In the channel header, select a language from the drop-down menu.
- Locate the content you want to remove from the channel.
- Click
 . The content is removed from the channel list and the number of assets updates.
-
Associate one or more audiences to the custom channel.
- In the Audiences section, click Select audiences.
- Search for the audiences you want to access the custom channel.
- Click for all audiences you wish to associate to the custom channel.
- Click Done. The Create Channel page displays again.
- Click Publish. The custom channel publishes to Percipio and is available to the users in your selected audiences
Note: If you do not select an audience, the custom channel displays to all learners via the All users audience. If a learner is not entitled to content in the custom channel, an error message displays to him instead of the asset. To avoid this, select one or more audiences associated to the license pool in which the channel's content is included. -
Select one of the available actions:
- Save and close: Saves your changes for modification or publication later, and places your channel into a Draft status. You can then associate the custom channel to an audience.
- Publish: Publishes your channel to Percipio, and places your channel into a Published status. By default, the custom channel is associated to the All Users audience. If you do not want all users in your organization to access the content within your custom channel, associate the custom channel to another audience.Note: It may take several minutes for the channel to display in the library and in search results.

