Create CAISY for Presentations
CAISY for Presentations is a great way for learners to practice giving presentations. You can create a presentation simulation to:
- Coach your sales team on pitching your product
- Prepare an executive for a big meeting
- Train your trainers so all are teaching the same material in the same way
- Upskill employees on delivering presentations and practicing their public speaking
Learners can practice these presentations or parts of the presentations repeatedly in a safe realistic environment, and get instant feedback on their performance based on a custom rubric. When you create a presentation, you upload a slide deck and determine the criteria that learners should aim to meet when they deliver the presentation to an attendee group comprised of AI personas. Your AI personas can ask questions of the learner which tests the learner’s knowledge. At the end of the practice, learners receive instant feedback on how well they performed based on the custom rubric.
Best practices for creating a presentation
When you create a presentation simulation, we recommend the following:
- Have a finalized slide deck in Microsoft PowerPoint (*.pptx) format that is no larger than 100 MB.
- Split your presentation slides into sections so that learners can focus on different criteria for each section.
- Keep in mind who the intended attendee group is. This could be multiple groups with different personas.
Create a Presentation Simulation Overview
When you create a presentation simulation, you need to specify details in three distinct areas. As you work through the details needed to make the simulation as life-like as possible, the system saves your changes automatically so you can go between areas without losing changes.
The three areas when creating a presentation simulation are:
- Content details: This area is where you specify the title and description. These show to learners when you publish the simulation to the Skillsoft Platform.
- Attendee questions: This area is where you specify which AI personas will be in the attendee group when the learner delivers the presentation and what questions they will ask.
- Evaluation criteria: This area is where you can break the presentation into sections allowing your learners to practice in small chunks before delivering the entire presentation. For each section, you specify criteria that AI uses to evaluate the learner's presentation.
You start by uploading your presentation. You then enter the details either on your own with the assistance of AI.
Create a Presentation Simulation Workflow
To get started creating a simulation:
- From the Home page or the Apps page, select CAISY for Presentations. You now see the CAISY for Presentations list page.
- Select Create New and choose a project for the presentation you plan to create.
- Select Next.
- Upload the presentation slide deck. Be sure to upload a Microsoft Powerpoint (.pptx) file that is no larger than 100 MB. You can also choose to search your Knowledge Sources if you have a presentation in your repository.
- When you presentation has finished uploading, you can choose how you want to start creating your presentation simulation. You can choose to have AI generate the description, attendee groups, questions, sections, and evaluation criteria that you can then review and edit, or you can choose to enter all the detail on your own. We recommend selecting AI so that you have a starting point. If you choose to do it on your own, and find the task to daunting, you can always choose to Generate settings with AI at a later time.

- After you choose how to get started, you edit and review all areas. As you work, all your changes are automatically saved so you can go between areas at will without fear of losing changes. See each section for more details.
- Before you can preview or publish your presentation simulation, you must Confirm updates on both the Attendee question and Evaluation criteria pages.
- Once you have completed all required fields and confirmed updates, you have the following options:
- Preview: Opens the content you just created so that you can try it for yourself and ensure it works as expected.
- Publish: Note, you only see this option if you have LX Design Studio publishing privileges. This option publishes your content to the platform. You can make it available to a specific group of learners via search only, or add it to a channel or journey.
- Select Publish.
- Check the box: I also want to make this available to learners right away. Ensure the users who should see your draft content are included in an audience. See Create audience for details on how to create an audience and add users.
- Select Select learners, and then choose your audience from the list. By default all users in your company are selected.
- Select Save.
- Select Publish again. When you publish content, it shows in the Manage Content Items list in the platform.
- Select Go to Percipio. You see your new content in the list. People in the audience you selected should be able to search on your content title to find it. At this point they cannot browse to it.
- If you want, you can also add your new content to a channel or journey and make that channel or journey available to a select audience of reviewers that can test the new content to make sure it meets organization standards. Visit the Create Custom Journey or Create Custom Channel pages for more information on how to add custom content to a channel or journey and entitle it for just one audience.
- Exit: Be sure you see the word Saved in the upper right corner before you exit. When you exit, your content saves as a draft that you can return to at any time.
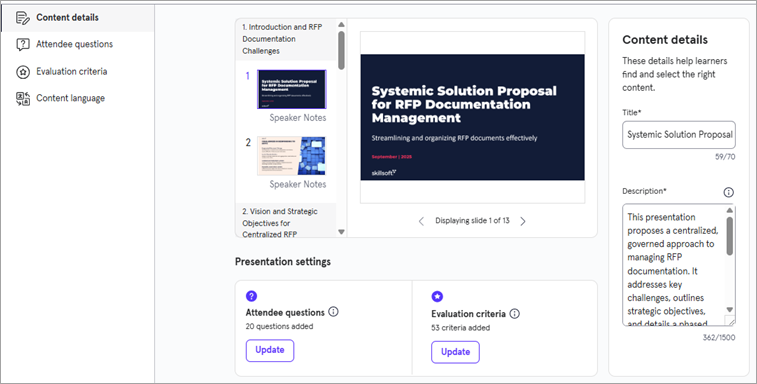
Content Details
This area is where you specify the title and description. These show to learners when you publish the simulation to the Skillsoft Platform. These are also used to determine the value of meta data tags in the platform.
If you chose to have AI generate settings when getting started, the title and description are populated for you. Make any edits you need to ensure it meets expectations and that AI did not hallucinate.
To change the content details:
- Ensure Content detail is selected from the left navigation.
- Edit one or both fields:
- Title: By default this is the name of the presentation file you uploaded. Change it to what makes sense.
- Description: Revise the description to meet the expectations of your learners.
- Changes are saved automatically. You do not need to confirm these updates.
Attendee Questions
This area is where you specify which AI personas will be in the attendee group when the learner delivers the presentation and what questions they will ask. You select the personas from a list of 10 system-provided personas and group them into an attendee group. You can have multiple attendee groups for a presentation simulation. For each slide in your presentation, you can have an attendee ask one or more questions.
- Attendee group: This is a selection of personas who will watch the presentation the learner gives. You can select from a list of 10 personas provided by the system. Each persona has a biography that you can view.
- Attendee: One of 10 system-provided personas that are part of an attendee group.
Things to complete in this area include:
To get started, navigate to the Attendee question page. You can either:
- From the left navigation, select Attendee questions
- Select Update from the Attendee question box on the Content details page.

Attendee groups
If you used AI to generate settings, you see attendee groups created for you. These are shown as tabs across the top. You can add more attendee groups, edit existing ones, or delete them.
You must Confirm updates before you can preview or publish
If you don't see an existing attendee group that meets your requirements, you can create a new one.
- Select Add attendee group > Create new attendee group
- Give your group a name.
- Browse through the list of system-provided personas and choose the ones you want to be in your group.
- Select Add to save changes.
If you have an attendee group already created, you can add it to your presentation simulation.
- Select Add attendee group > Select from existing groups.
- Select an attendee group from the dropdown list.
- Select Add.
- Select any current attendee group from the tabs at the top.
- Expand the Attendee section.
- Select Delete attendee group remove the attendee group. If any attendee has associated questions, you cannot remove the group until you remove or reassign the question.
- Select any current attendee group from the tabs at the top.
- Expand the Attendee section.
- Select Edit attendee group to open the list of available attendees.
- Select and unselect members from the list. Select View bio next to any attendee to see a description of their character. The learner also sees these descriptions when delivering the presentation so they can cater their presentation to the specific attendee group's needs.
- Select Update to save the attendees in that group.
Slide Selection
If you used AI to generate settings, you see a set of slides selected for each attendee group. You can change which slides are selected. If a slide has one or more questions associated with it, you must remove the question(s) first.
If you are creating the presentation simulation on your own, you must select slides from your presentation that you want an attendee to ask a question on.
- Select any current attendee group from the tabs at the top.
- Expand the Slides section. Selected slides have a highlight around them.
- Click on a slide to select it for a question or click a highlighted slide to remove it. You can only remove slides that have no questions associated to them.
- You must Confirm updates before you can preview or publish.
Questions
If you used AI to generate settings, you see a set of questions for each slide selected for an attendee group. Review each question, which attendee asks it, and the guidelines specified for the learner's response so that AI can evaluate it.
If you are creating the presentation simulation on your own, you must specify all question details for each slide selected for each attendee group specified.
- Select the attendee group from the tabs at the top.
- Expand the Questions section of the page. You can edit existing questions, remove questions, or add questions for each slide. For each slide selected, specify the following information:
- Question from attendee: Type out the question that you would like the attendee to ask the presenter.
- Guidelines for the presenter's response: Create the desired response of the presenter. These guidelines are used to evaluate the presenter's response.
- Who asks the question: Select the specific attendee from the chosen group that you want to ask the question.
- You must Confirm updates before you can preview or publish.
- Select the attendee group from the tabs at the top.
- Expand the Questions section of the page.
- Locate the question you want to delete, and select the trash can icon. This removes the question, but does not unselect the slide. You must expand the Slides section and unselect the slide.
- You must Confirm updates before you can preview or publish.
Evaluation Criteria
This area is where you can break the presentation into sections allowing your learners to practice in small chunks before delivering the entire presentation. For each section, you specify criteria two types of criteria, Delivery style criteria and Content and structure criteria. These criteria are used to evaluate how well learners do in delivering the presentation. You can choose the criteria and how much weight each criteria should carry in the overall evaluation. Learners get a score for each section based on the criteria and weight set.
Learners can practice the presentation in sections with different attendee groups, but they only see progress and completion when they practice the full presentation.
Things to complete in this area include:
To get started, navigate to the Evaluation criteria page. You can either:
- From the left navigation, select Evaluation criteria
- Select Update from the Evaluation criteria box on the Content details page.
Section definition
Organize your slide deck into sections so that learners can practice in small chunks and focus on key points in each. For each section you create, you define criteria. Learners are evaluated on the criteria for each section and get a score for each section. When you have sections, learners know in detail what they do well and what they need to work on.
If you are creating the presentation simulation on your own, you can specify sections. If you chose for AI to generate settings, you see a set of recommended sections that you can edit and revise as necessary. You do not have to add sections. You can opt to have the entire presentation in one section, which you might want to do if the presentation is small. Otherwise we recommend that you create sections so the learner can get detailed feedback.

- Expand the Sections section.
- In Section 1, give the section a name.
- The From slide starts at slide 1. In the To slide, choose the last slide in that section. If it is not the last slide of the presentation, a new section is automatically created starting with the next slide number.
- In Section 2, give the section a name.
- Choose the last slide in that section. Continue in this manner until you have added all sections you want.
- If the last section acts like an appendix that the learner does not need to be evaluated on, you can select the check box at the top: This deck includes an appendix at the end, which will not be evaluated.
- You must Confirm updates before you can preview or publish
- Expand the Sections section.
- Locate the section you want to delete, select the trash can icon to delete it. When you delete a section, the slides from that section get incorporated into the previous section.
- Expand the Sections section.
- Locate the section to modify. You can change the section name or the To slide.
- When you change the To slide, the subsequent section From slide is automatically updated. Continue in this manner until you have the sections defined as you want them.
- If the last section acts like an appendix that the learner does not need to be evaluated on, you can select the check box at the top: This deck includes an appendix at the end, which will not be evaluated.
- You must Confirm updates before you can preview or publish
Criteria definition
Each section has two sets of criteria on which learners are evaluated, Delivery style and Content and structure.

The following are the criteria available for each section you define:
- Delivery style criteria: By default the system provides five delivery style criteria. You cannot remove these criteria, but you can change their weight. You can also add your own delivery style criteria. The weight of all criteria in this section must add up to 100%. The default system criteria are:
- Professionalism: Were you professional, such as showing empathy and support, being guiding and direct, and using manner? Professionalism maintains trust and keeps the conversation respectful and credible. It adapts tone and style based on context. In Customer Service, you show empathy and offer solutions with a moderately formal tone. In Team Collaboration, you communicate directly and efficiently with appropriate informality. In Business Exchange, you use a formal, precise, and polished tone. This criterion also reflects the Four Universal Pillars - Clarity, Brevity, Tone, and Politeness - and helps you avoid negative impressions that could harm relationships or brand reputation.
- Empathy and emotional intelligence: This criteria focuses on the presenter's ability to understand and respond to emotional cues, manage their own emotions during the presentation, show genuine empathy toward their audience, and create emotional connections that enhance communication effectiveness.
- Grammar: How well did you meet standard grammar rules. Grammar ensures clarity and correctness, reduces misunderstandings, and helps the message convey your intent. It reflects attention to detail and professional credibility, which impacts how the speaker is perceived. It also evaluates your response with the designated locale to ensure fair, consistent standards.
- Clarity, Consistency, and Coherence: Were your responses thoughtful and follow a common thread and make sense to what was being asked? Coherence ensures logical flow at both the sentence and conversation level. It helps the recipient follow your message without confusion or unnecessary topic jumps. It supports moving toward a resolution or clear next step. It prevents “referential drift”- dropping or abandoning points mid-conversation - and reduces ambiguity from vague pronouns or unclear terms like “this,” “that,” or “it.”
- Efficiency: Did you ramble on or were you succinct but personable in your response, getting to the point quickly? Efficiency respects the other party’s time by keeping your message concise and purposeful. It aligns your response with the goal, improves comprehension, and reduces effort. It also clarifies next steps and ownership. In Customer Service, you anticipate and address likely follow-ups. In Team Collaboration, you deliver concise handoffs with clear ownership. In Business Exchange, you use precise structure with well-scoped actionables.
- Content and structure criteria: These criteria are defined by you based on the contents and order of the presentation. If you used AI to generate settings, it defines content and structure criteria for you that you can revise as necessary.
- Expand the Evaluation criteria section.
- Choose the Section from the header across the top.
- For each criterion in a criteria set, you can:
- Change the weight of a criteria. The total weight of all criteria in a set has to total 100%. Criterion with more points make up a larger portion of the overall grade.
- Add criteria. Select Add criteria and provide a name and a weight. Criteria may be as simple as grammar, or knowledge of the material, or may be as detailed as giving certain vocabulary the user must include.
- Remove criteria. Select the trash can icon next to the criteria. You can remove any criteria you added. You cannot remove any default Delivery style criteria, but you can change their weight.
- You must Confirm updates before you can preview or publish