|
|
|
Create a User Manually
To create a user manually
- Click Users & Groups | New User on the navigation bar.
- Enter the information for the new user:
- Status: An activated user can log in to SkillPort; a deactivated user cannot.
- User Name: The user's login name. The user name is converted to lowercase before it is validated. The user name cannot start with an apostrophe (') or a dash (-). Neither non-breaking white spaces (space, tab, new line) nor double-byte characters (for example, Japanese or Chinese characters) are allowed.
The following characters are allowed: abcdefghijklmnopqrstuvwxyz0123456789@$_.~'-
The following characters are not allowed: <> [ ] ( ) ; \ /
Also note that there exists a list of reserved words that you cannot use (doing so produces an error). The following are the most common: add, all, block, count, down, force, link, mount, off, simple, tag, up.
- Password: All single-byte characters are allowed except back slash ( \ ). Neither non-breaking white spaces (space, tab, new line) nor double-byte characters (for example, Japanese or Chinese characters) are allowed.
- Force Password Change: Select this check box if you want to force the user to change his or her password immediately after logging in for the first time.
- First Name, Last Name: All Latin-1 and double-byte characters are accepted.
- Email Address: The following characters are allowed: abcdefghijklmnopqrstuvwxyz0123456789 - _ . * ^ + = @ '
Capital letters are also accepted.
Note: If you do not supply a password, first name, or last name, the value for User Name is used as its value. Also note that the fields for entering user information for new users are determined by the User Profile settings.
- Specify a group in which to locate the new user by doing the following:
- Beside Group Membership, click Edit.
The Select Groups dialog box appears.
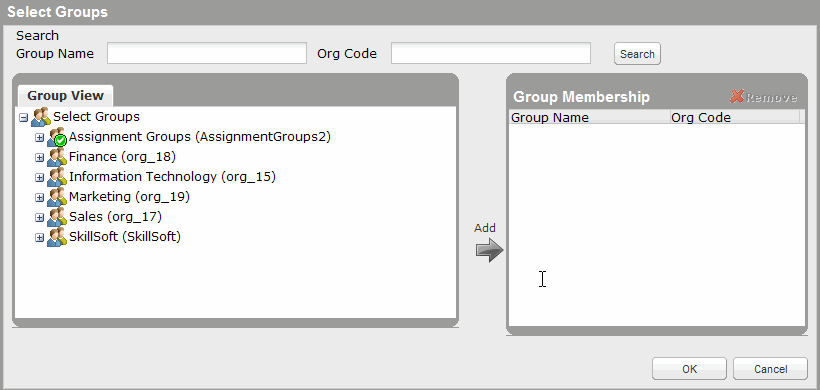
- In the left pane, select the group to which to add the user.
A user can belong to any number of normal (organizational) groups, but he or she can only belong to 1 advanced group. By default, the new user will inherit the content assignments of any groups to which he or she belongs.
You can use Ctrl+click or Shift+click to select multiple groups. You can also use the controls provided to search for the desired group. If needed, you can enter an asterisk (*) as a wild card that represents one or more characters.
- Click
 (the Add arrow).
 - If you need to remove the user from a group, select the group name in the Group Membership pane, and click Remove.
- Click OK. The Select Groups dialog box closes.
- Beside Group Membership, click Edit.
- For Role, select the role of the user.
If you select a role other than End User, and if custom user privileges have been enabled on your site, you can click Customize beside Role, and then customize the user's privileges. This allows you to limit access to a subset of administrator features.
- If the approval manager feature has been enabled on your site, you can specify the approval manager who must approve or reject the user's requests to enroll in learning programs and Live Learning courses, or to accept or deny Development Plans (if enabled on your site). To do so, do the following:
- Beside Approval Manager, click Edit.
The Select User dialog box appears.
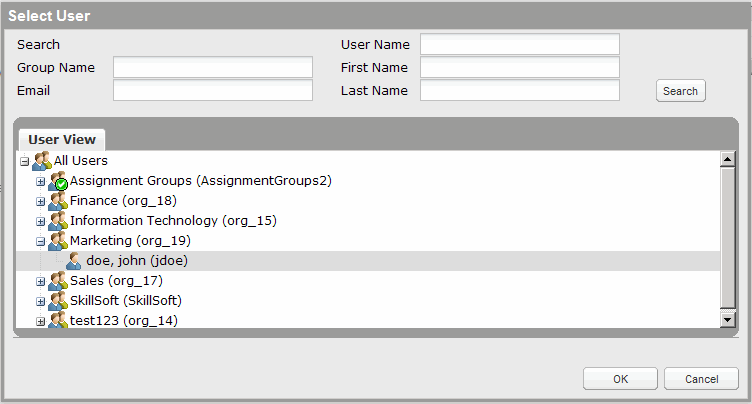
- Under User View, select the user's approval manager.
You can also use the controls provided to search for the desired approval manager. If needed, you can enter an asterisk (*) as a wild card that represents one or more characters.
- Click OK. The Select User dialog box closes.
- Beside Approval Manager, click Edit.
- If the Send Welcome email check box is enabled on your site, you can choose whether to send a welcome email. Select the check box to send the email. Alternatively, clear the check box if you do not want to send it.
Note: No email is sent if an invalid email address is specified for the user.
- Click Save. The user is created.