Create a Schedule
Before creating a schedule, it is important to understand how the schedule dates and the template date filters relate to each other. See Understanding Date Settings for more information.
To create a schedule
- Click Templates and select either the Default or Personal tab.
- Select the desired template.
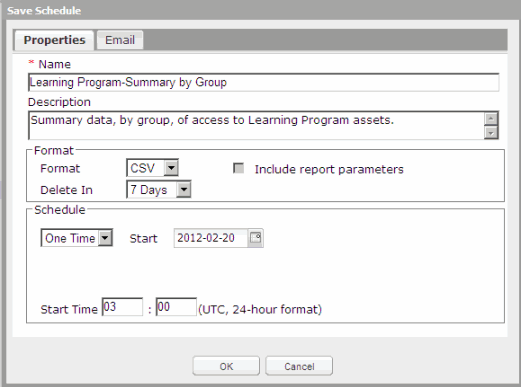
- Click Schedule. The Save Schedule dialog displays with a Properties tab and an Email tab.

- In the Properties tab complete all fields as described below.
- Name - (Required) Modifiable field pre-populated with the name of the saved template. Creates the name of the schedule and the name of the report generated by the schedule. Max character limit is 256. Accepts alphanumeric characters only. Does not support the use of any special characters.
- Description - Modifiable field pre-populated with the description from the saved template. Field can be blank. Max character limit is 512.
- Format - Determines the format of the saved report generated by the schedule. Choices include: Excel, HTML, CSV (default), PDF. When opened, a saved report displays in the viewer associated with the file type on the user's machine.
Note: Reports saved in the Excel format may have an extra column in every row. You cannot hide this column in the report template, however you can remove the column once you open the report in Excel.
- Delete In - Determines when the report generated by the schedule will be automatically deleted from the Results tab. Choices include: 7 Days (default), or 30 Days. To store a report for longer than 30 days, use the Download option.
- Include report parameters - When checked, parameters such as template name, description, date generated, input options, and last successful database refresh will display in the report generated by the schedule. Default is unchecked. Cannot include parameters in a CSV file.
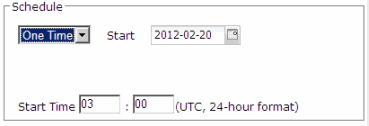
- In the Schedule section, select the type of schedule you want to create from the drop down. Complete all fields as described below.
Note: The time zone for all schedule Start times is UTC.
- If desired, click the Email tab and check or uncheck the option.
- Email Notification - Sends an email to the user's SkillPort email address that indicates the scheduled report ran. If no email address is specified for the SkillPort user account, this check box will be disabled. If the current user account email address is changed, any existing schedules will not be automatically updated.
- Click OK. The schedule displays on the Schedules window.
Last Updated:
8/24/2012 5:01:10 PM
 One Time Schedule


