CCPS Quick Reference Guide
The steps in this Quick Reference Guide support publishing all Supported Content Types to Skillport. Content created with third-party content development tools is also supported as long as the content follows the Custom Content Authoring Guidelines.
Two options are available for publishing custom content:
- Full service Custom Content Services: This service is provided via the Skillsoft Custom Content Publishing Team to provide expert assistance to clients in testing, packaging, and deploying their custom content/courses onto the customer’s Skillport site.
- Skillsoft's Custom Development Services organization offers complete elearning content planning, development, and deployment services for content built with Skillsoft tools. It also offers interoperability testing for content built with third-party tools and content packaging and deployment to Extranet and Intranet versions of the Skillport platform. For more information, see Skillsoft's Custom Development Services Group.
- Self Service: Administrators can use the Skillsoft Custom Content Publishing Solution to test, package, and deploy their custom content onto the customer's Skillport site.
The scope of this document is the self service option.
The two overall steps for publishing your custom content include:
- Create your content by following the Custom Content Authoring Guidelines.
- Use the Skillsoft Publisher to package, validate, and publish content to your production server.
Creating Your Content
Skillsoft offers Authoring and Packaging Guidelines for courses created for the Skillport environment. Before using the Skillsoft Publisher, prepare your standards-based content using one of the following Authoring and Packaging Guidelines:
Using the Skillsoft Publisher
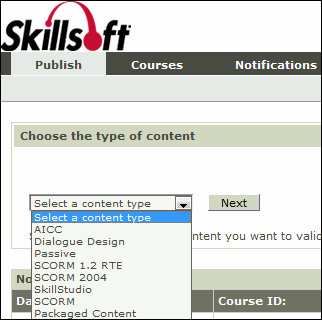
- In the Skillsoft Publisher, on the Publish tab, select the content type you want to publish from the Select the content type dropdown, then click Next.
- If the desired content type does not display in the drop down, click Configurations and select it from the Supported Content Types section.
-
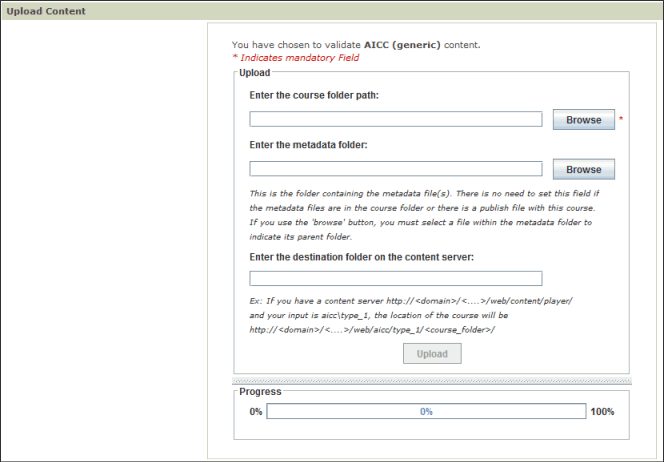
- Click Browse to enter the location information by selecting a file from the course folder, then click Next.
- After you enter the location information, Publisher looks for the Publish file (
sppub.ini) in the course root folder. If the sppub.ini file does not exist, Publisher creates the publish file and prompts you for the publish information.- If you are updating a course that has already been published, the
sppub.ini file will already exist in the course folder and this screen will not display. If you wish to modify the previous sppub.ini file, you can either open the sppub.ini in a text editor and make the appropriate changes, or delete the file prior to republishing the content.
-
- If prompted, create the metadata information in the Publish File Data page for the
sppub.ini file. See Publish File Property List for a description of each field. 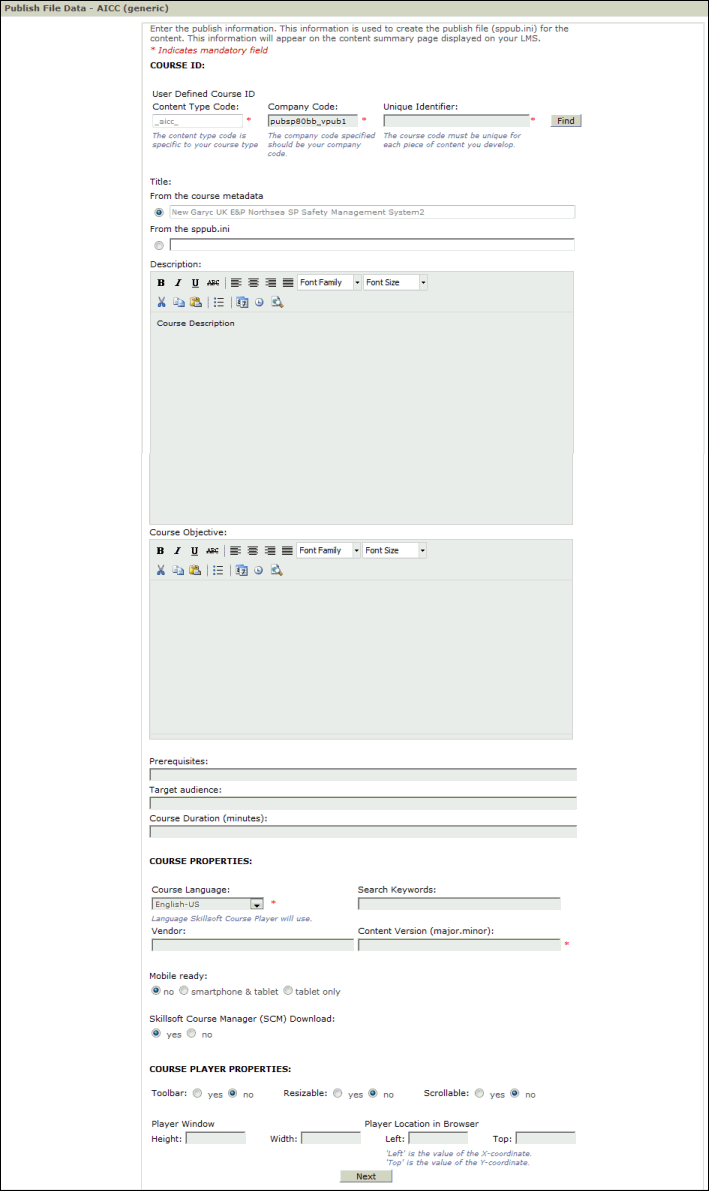
- Click Next.
- Publisher performs a Static Check to validate metadata files, converts the course for use with Skillport, and packages the content. The Course Details page displays.
- If an error occurs during conversion, the Convert Course page displays with the course and error details, and the suggested action. You can save the error report or perform the conversion again using the relevant buttons provided.
-
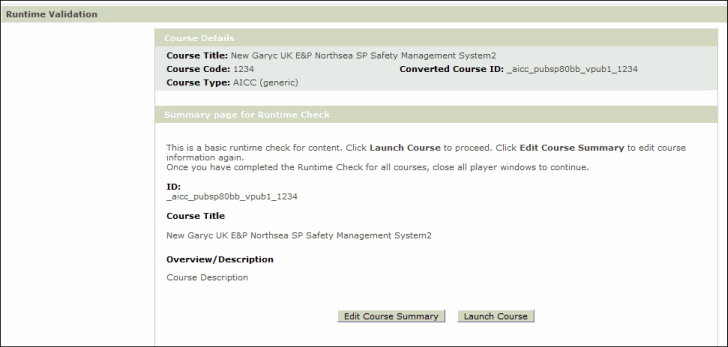
- (Optional) To open the Publish File Data page and make changes to the
sppub.ini file, click Edit Course Summary.
- Click Launch Course to check the course content in the test site.
- If you are using Internet Explorer 10 with Windows 7 in non-compatibility mode, SCORM 2004 courses will fail the runtime check. Therefore, use compatibility mode for SCORM 2004 courses.
- In the Player, verify the integrity of the instructional design, graphics, assessment questions, and test scores. Close the player to enable the Next button on the Course Details page.
- Click Next to view the Course Details section (including the course title, course code, converted course ID, and the course type), and the runtime check results.
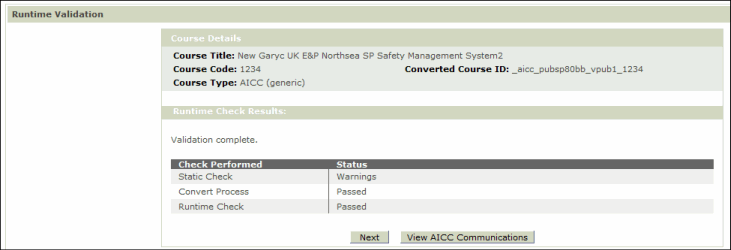
- Click Next to launch the Package Setup page.

- If desired, click View Course Log to view the course log file before continuing.
- Click Publish to Preview to view the contents in a preview site.
- This option is only available if preview sites have been enabled by your administrator.
- Click Publish to SkillPort to publish the content to your Skillport site.
- When the Verify Content page displays, click Start to verify the content.
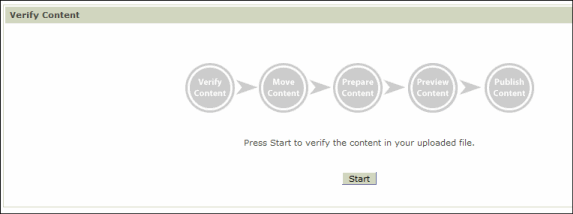
- The content automatically progresses through each stage of the verification process. When the content has been checked for viruses, and indexed for the SEARCH&LEARN feature, the Publish Content page displays.
- Click Start to publish your content to the selected production site. A message displays asking you to confirm the publication.
- Click OK. Your content publishes to the production site.
- Once your content is published to the production site, click Upload same course to publish the same content to another production site, or click Upload another course to publish a different course.
Assign the content to your users
Once your content is published, you must assign it to your users and groups in Skillport. All custom content is located on your Skillport instance under your custom content folder in the Course Catalog. You must have Admin or SuperAdmin privileges on Skillport to assign users.
See the following sections in the Skillport Knowledge Base:
For further assistance:
© 2017 Skillsoft Ireland Limited


