Reactivate a User
You can reactivate inactive users individually, or by using the bulk import feature.
- From the left navigation bar, select Users > User Management. The User Management page displays.
- Locate the inactive user you want to reactivate.
- In the Actions column, click
 >
>  . The Edit User page displays.
 - In the Status field, select Active.
- Optionally, select Require this user to change their password during first-time log in to force the user to change their password when they sign into the platform for the first time.
- Optionally, select the date and time you want to send an initial Welcome email. Note: The date and time are based on your local system settings, not the email recipients' settings.
- The user must have a valid email address included in the profile to receive the Welcome email.
- Click Update.
Entering a value in the Password field automatically enables this feature, which is indicated when the option is selected. Once the user changes their password, this feature automatically turns off and the check box clears.
- From the left navigation bar, select Users > User Management.
- Select Download List to generate and download a CSV file containing all of your users and their user profile data. Alternatively, if you have an existing CSV file you wish to import, skip to the next step.
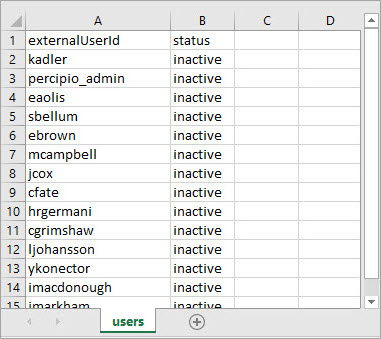
- Open the downloaded file and remove all columns except for externalUserID and status. This avoids any accidental overwrites for other users and data in the platform.
- Locate the users you want to reactivate and, in the status column, change their status to active.
- Save the CSV file.
- On the User Management page, click Import.
- Click the PREVALIDATE tab.
- Open your saved CSV file and click Prevalidate Users. The platform conducts the following checks on the import file:
- File format (CSV)
- Authorized separators: a comma (,) a semicolon (;) and the Tab function.
- Empty file
- Maximum size
- CSV field values
- If any errors occur, click Download prevalidation report to and correct them.
- Click the IMPORT tab.
- Click Select a file to browse to your CSV file.
- Select the date and time you want to send the initial Welcome email. Note: The date and time are based on your local system settings, not the email recipients' settings.
- The user must have a valid email address included in the profile to receive the Welcome email
- Click Import.
- View the bulk import reports.
Note: We recommend you that you prevalidate the CSV file prior to uploading it. You cannot undo an import. We suggest that you keep your CSV files at least one back in case you need to roll back any changes.
Optionally, sort your CSV by status.
The file imports, and users update automatically.
When you reactivate a user, any assignment they were part of, gets added back with original dates.