Study Groups
If enabled on your site, you can invite others to learn with you. This can help you increase your enjoyment and interactivity, get support and new perspectives, create motivation and celebrate milestones together, and boost your knowledge retention and practical application of new job skills.
You can form a study groups around any type of Skillsoft content and all types of custom content except for live courses. You can initiate a study group experience or join one that someone invited you to.
When you learn with others, those in the group see your name and your progress and you see theirs. Use it as a way to offer support and encouragement and keep everyone engaged.
When
How to access the Study Groups page
To access the Study Groups page:
- From the left navigation bar, select My Learning, then locate the Study Groups section and select See all study groups.
How to start a study group
To start a study group:
- Search or browse for content, such as a book or a course, that you are interested in completing.
- From the actions menu
 , on the content card or in the content item select Study groups.
- Follow the stepped workflow.
- Step 1: Create the experience: In this step, set the tone for those you want to invite by giving the study group a title and description as well as a start and end date. The description shows on the initial invitation email and on the Study Groups page. The end date is used as a way to keep the group moving and celebrate when you are done. You cannot change the information in this step after you save it in step 2.
- Step 2: Review and save: In this step, double check your experience title, description, and start and end dates, and if you want, add a link to a Microsoft Teams or Slack channel where you can collaborate and discuss the content with those you are inviting.
After you save and continue, you can't edit or change the details.
To add a link to a social platform
- Select the type of social platform, either Microsoft Teams or Slack.
- Go to your social platform and create a space or channel in which to collaborate while learning together.
- From the social platform, copy the link to the channel.
- Paste the information into the Channel field.
- Step 3: Invite others: Now that you created and saved the experience, you choose how to invite others to learn with you:
- Share link: Get a URL that you can paste into a personalized email or web site that others can access. The URL takes the invited learner to their Study Groups page on the Active tab where they can then join.
- Invite others by adding their email: If you want others to automatically receive an email invitation with links, enter their email address. You can only invite people who have an active account on the platform.
- After you save, you see the study group experience on the Study Groups page on the Active tab. You can choose to invite others to learn with you at any time with the Share Link option. All participants must complete the content in the language that is active when you create the study group.
When you're invited to a study group
If one of your colleagues invites you to join a study group, you might receive an email notification with a URL or you might follow a URL from a web site. Either way, when you follow the link, you land on your Study Groups page on the Active tab.
On the Active tab, you see the study group you were invited to. You can choose to join or decline it. If you previously joined, you can also choose to opt out.
Join
When you join a study group, those in the group see your name, your progress, and your profile picture if you have added one, and you see theirs. Use it as a way to offer support and encouragement and keep everyone engaged.
Progress you make on the item is tracked and updated in the study group until the end date is reached. Once the end date is reached, you can continue to access and complete the item, but you won't see your progress in the study group change. You can see any activity on the item after the end date on your Learning Activity page.
You must complete the content in the language that is active when you create the study group.
Decline
If you are not sure you will have time to commit to learning with others, or the topic is not of interest, you can decline the invitation. When you decline an invitation, the experience is removed from both your Active and Closed tabs and you cannot rejoin. Your name and progress never display to other learners.
Once you decline, you cannot choose to join again.
Opt out
If you previously joined a study group that you no longer want to participate in, you can choose to opt out. When you opt out, the experience is removed from both your Active and Closed tabs on the Study Groups page, and you cannot rejoin. Your name and progress no longer displays to other learners. You do not lose any progress you made with the content item and you can continue to access it and complete it outside of the study group. You see any progress for the content item from the Learning Activity page.
Actions from the Study Groups page
From the Study Groups page, you can manage all aspects of your study groups.
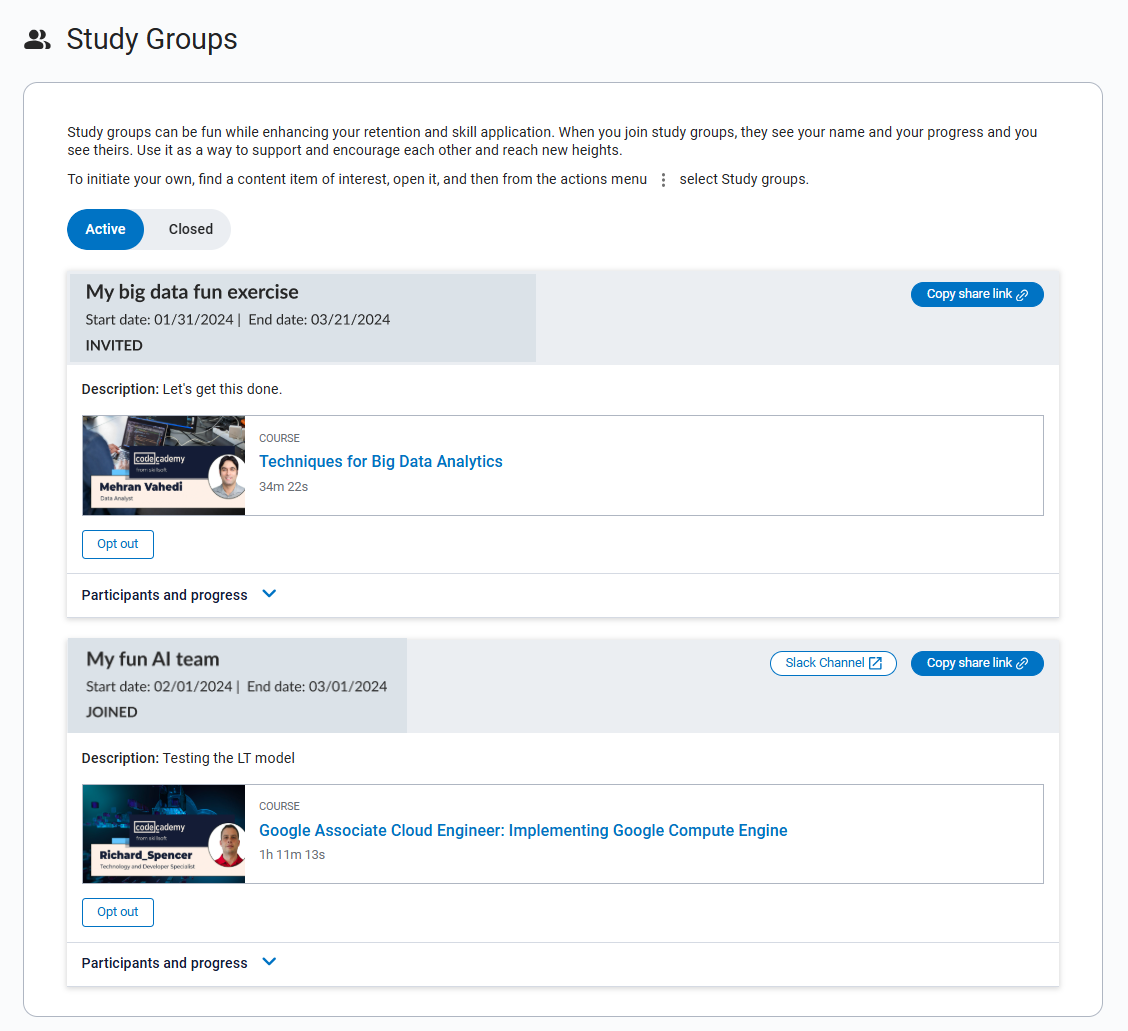
You see two tabs:
- Active: On this tab, you see all study groups that you started, that you joined, or that you were invited to join.
- Closed: On this tab, you see all study groups that you participated in that have reached their end date.
The actions you can perform on a study group depend on whether you initiated it or were invited to join and how it was set up. You may see these options:
- Join: Select to join a study group you were invited to.
- Decline: Select to decline a study group you were invited to. Once you decline, you cannot rejoin.
- Opt out: Select if you no longer want to participate in a study group you previously joined. Once you opt out, you cannot rejoin.
- Link to a Microsoft Teams or Slack channel: If configured for an experience, you can collaborate with members at the channel link provided.
- Copy share link: Select if you want to invite others to join the study group, then paste the copied URL into an email or website so others can join.
- View participants and progress: For those experiences you joined, you can view other participants and their progress. Use it as a way to offer support and encouragement and keep everyone engaged.