Create a Content Banner Promotion
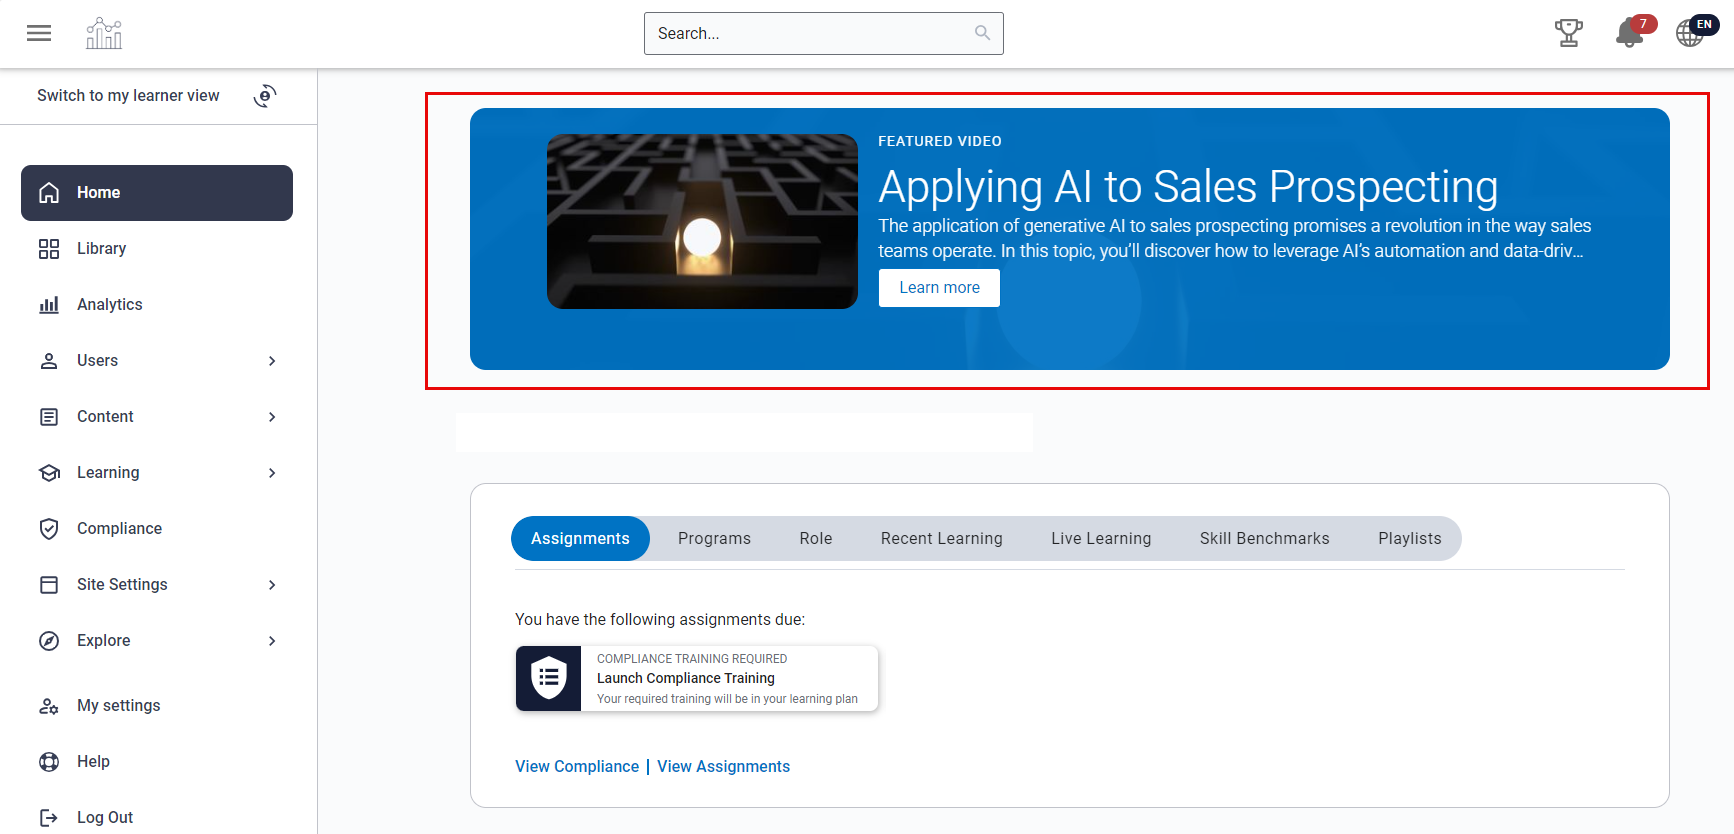
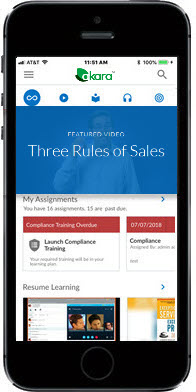
You can have up to five banners display via a carousel at the top of your learners' home page. You can set the banners to automatically scroll every 7 seconds. Learners have the option to individually turn automatic play on or off and to manually scroll through banners with the next and previous buttons.
To create a new content banner promotion
- From the left navigation bar, select Learning > Content Promotions. The Content Promotions page displays with the CONTENT STRIPS tab open by default.
- Select Create New Promotion.
- Select Banner promoting a channel or content item from the library. The New Promotion - Library Content Banner page displays.
- Enter the Banner promotion title. This is only the title of the promotion itself, not what displays to learners on the banner.
- Select a Language from the drop-down list. This only affects the language of content you can add to the banner (for example, if you select German, when you search for a content item to promote in the banner, only German content items display in your search).
- Enter a Start date.
- Optionally, enter an End date. The promotion stops at 11:59:59 GMT of the selected day.
- Select Add content.
- Search for the content item you want to promote. Optionally, you can filter the results using the Filters on the left hand side, then click
 . You may only display one content item per banner.
 - Select Done.
- Optionally, select Customize banner to change colors and text appearing in your banner. The image that displays in the banner is loaded from the image of the content item you selected; you cannot change the image. Note: If you are using a custom content item and decide to change its image, the banner is not automatically updated with the new image. For learners to see the new image, you must either remove the item from the promotion and re-add it, or create a new promotion all together.
- If you want something other than the content item title to display, in the Banner text section, enter a new title. We recommend no more than 30 characters.
- If you want something other than the content item description to display, enter a new description. We recommend no more than 140 characters.
- Optionally, modify the button text. We recommend no more than 25 characters.
- If you are finished with the banner customizations, click Done. The New Promotion - Library Content Banner page displays with preview of the banner for both the Web and Mobile App.
- Select a Background color or enter a hex color value. This is the banner's overlay color.
- Select a "Featured" text color or enter a hex color value. "Featured" text identifies the content type (for example, FEATURED VIDEO), and generates automatically above the title on your banner.
- Select a Title description text color or enter a hex color value for your banner text.
- If you are finished with the banner customizations, click Done. The New Promotion - Library Content Banner page displays with preview of the banner for both the Web and Mobile App.
- Select a Button background color or enter a hex color value.
- Select a Button text and border color or enter a hex color value.
- Select a Button hover color or enter a hex color value to display when a learner hovers their cursor over the button.
- If you are finished with the banner customizations, click Done. The New Promotion - Library Content Banner page displays with preview of the banner for both the Web and Mobile App.
- Optionally, target your promotion to one or more audiences.
- Select Add audiences.
- Enter the name of an audience you wish to target, or browse the audience list.
- Select Done. The Create Promotion page displays again.
- Optionally, notify your target audience that the promotion is live by ensuring the Send promotional email for this content promotion is selected. If you choose not to send an email, unselect this option and proceed by selecting Create Promotion. When you choose to send the email (option selected), you can then customize your email as follows:
- Select Next, Notify users.
- Select a date to send your email. By default, the date defaults to the start date of your promotion. You can choose to have the email go on a different date. At any time throughout the duration of the promotion, you can choose to edit your promotion to update and resend an email.
- You can use the default text, but we recommend that you customize your email message by entering a Subject line, Pre-header text, Header text, and Custom text. The text you specify in these fields is meant to get the user to open the email and follow the links. To further personalize your email message, you can choose to use two variables within any of the text fields, {First_name} and {Organization_name}.
Example using variable (placeholders)
In this example, the learner receiving the welcome email is Kezia Adler, and their company is Akara.
In the subject line field, this string:
{First_name}, access to your Percipio account from {Organization_name} is nearly complete!Produces this subject line in the email for Kezia:
Kezia, access to your Percipio account from Akara is nearly complete! - Select Refresh Preview to see how your message will look to users.
- When the email is as you want it, select Create promotion and send email.
-
Select Create Promotion.
- If the promotion's Start date is set to today, the promotion launches to the targeted audiences immediately.Note: After creating your promotion, refresh your Skillsoft Platform home page to see it.
- If the Start date is in the future, the promotion launches to the targeted audiences at 12:00:00 UTC on the selected date.
- If you selected to send an email notification, the platform sends the email on the date specified.
- If the promotion's Start date is set to today, the promotion launches to the targeted audiences immediately.
Decide if you want the image of the content item to be used as a watermark in the background of the banner. Sometimes using the image makes the text hard to read. Unselect Show background image to maintain a flat color for the banner background.