Manage Assessments
You can edit, delete, and archive assessments to keep your library current. You can also move and duplicate assessments to help your team access them and coordinate for refining them.
Find an assessment
To find a specific assessment:
- From the Home page or Apps page, select Assessments.
- From the Assessments page, you can do one of the following:
- Search for a specific assessment. If you know the name of the assessment you are looking for, you can use the search bar to locate it.
- Change the order of how the assessments display in the list:
- Use the drop-down to order by date modified.
- Sort the column headings to order by Status, Date modified or Modified by.
- Toggle between viewing all assessments, or just the ones you created.
Manage an assessment
Depending on your permissions and the status of the content, you may see the following actions to the right or under the Show options menu for each:
- Edit: Opens the content so you can make any changes to the details. For more detailed information on editing content, see:
- Preview: Opens the content in the learner view so you can ensure it works as expected.
- Duplicate: Creates a copy of the content in the same project so you can update it without impacting the original.
- Archive: If the content has already been published, you can archive it so that you no longer see it in your Projects, Apps, or Content Items pages. It is moved to a separate Archived Items page. You can access all archived content from your profile drop down. The archived content is still available to learners in Percipio unless you retire it from your Percipio site.
- Move: Moves the content to a different project or workspace.
- Delete: If a content item is still in a draft status, you can delete it from LX Design Studio. When you delete content it is moved to a Deleted Items page. You can access all deleted items for up to 30 days from your profile drop down.
Edit an Assessment
- From the Home page or Apps page, select Assessments. You now see the Assessments page.
- Locate the assessment you want to edit and select the edit icon
 . You land on the Question Generation page. To expand the left navigation and see the other pages, select the right arrow icon at the bottom. You can edit any of the pieces of the assessment or re-generate the whole assessment if you want.
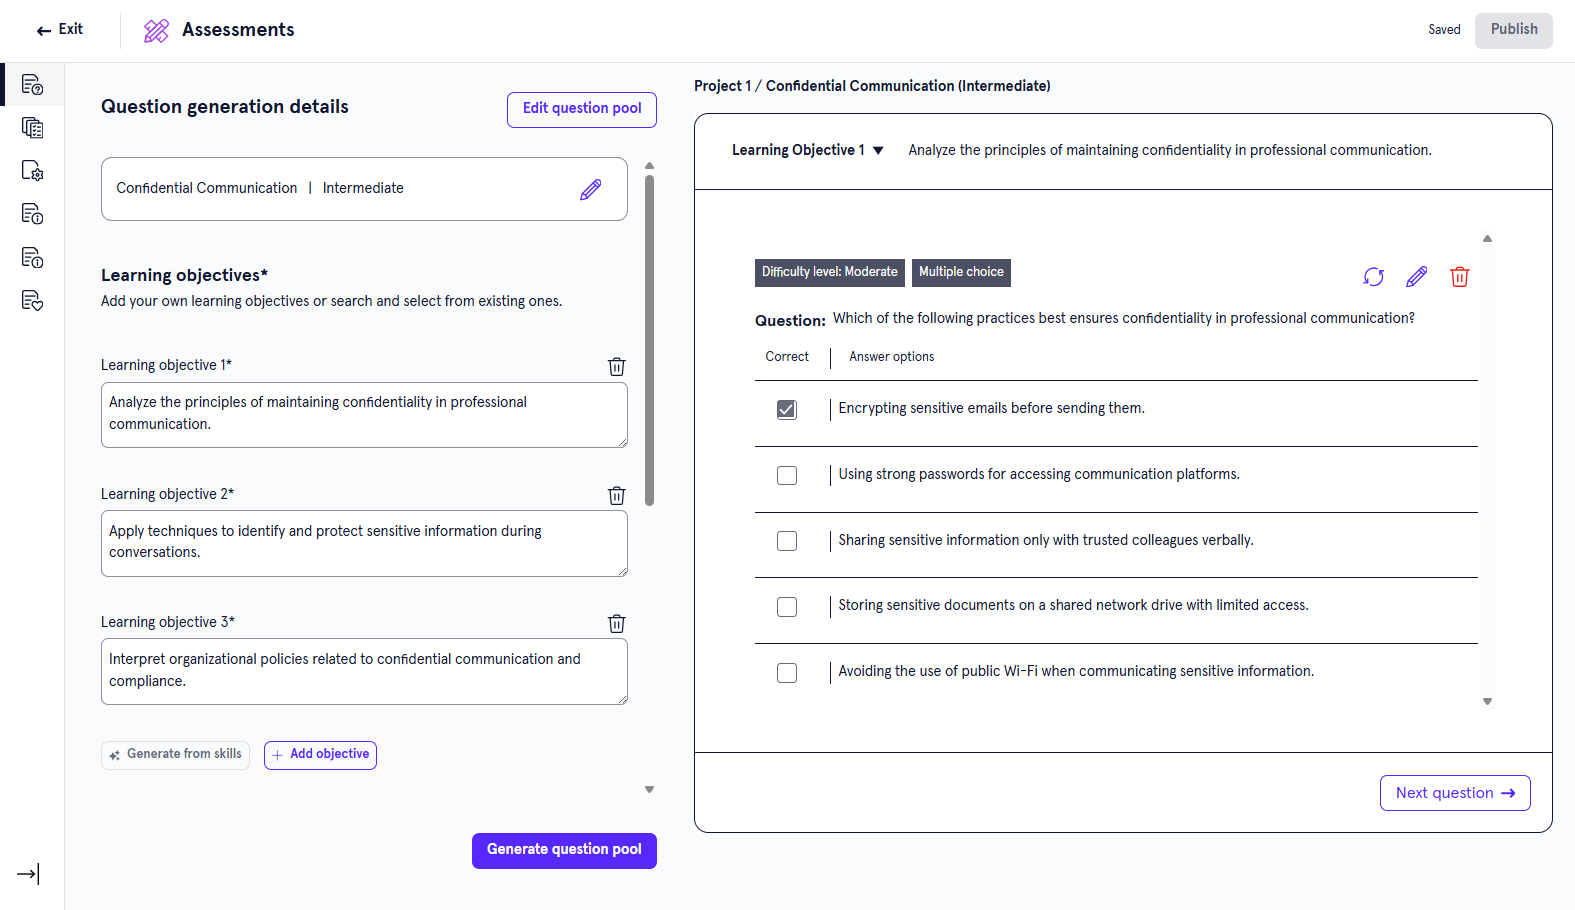
- Edit any of the following components:
- At the top of the Question Generation page you see the skill and profiency level for the assessment. You can select the edit icon to make any changes to this field. This is the primary focus skill of your assessment.
- Specify the learning objectives. Learning objectives are what learners should achieve upon completing this assessment. If you came from the Design Assistant, AI creates the learning objectives for you based on your conversation. You can edit whatever learning objectives the Design Assistant creates for you. If you started in the app, we recommend you start with the Generate from skills option and then refine, but you can also add your own:
- Select Generate from skills and allow your Design Assistant to create learning objectives based on the skills you entered. You can then edit or delete any of the learning objectives until they are to your liking. You can also add objectives to the AI-generated list.
- Select Add objective and write out what learners are being assessed on. Continue to add objectives until your list is complete.
To help ensure the Assessment app generates questions that measure what you want, the app runs a check on the learning objectives. This check ensures the learning objectives meet standards for clarity and instructional quality defined by Blooms taxonomy. If learning objectives do not meet the criteria of the design brief, you will not be able to continue to generate questions. However, if the objective is in your own taxonomy format but relevant to design brief criteria, you can continue to generate questions.
- In the Question type field, select the different types of questions you want to include in the assessment. The following question formats are offered:
- Single choice: Learners select one correct answer from a list of possible answers.
- Multiple choice: Learners select all correct answers from a list of possible answers.
- Matching: Learners match a series of statements to their correct counterparts.
- Scenario based questions: Learners read a scenario and then answer one or more questions based on the scenario. The questions within the scenario can be of the type single, multiple or matching.
In the Question per learning objective choose how many questions should be generated for each learning objective. For example, if you have 5 learning objectives and you select 2 questions per learning objective, the assessment will have 10 total questions.
Optionally enter any Additional details to help the Design Assistant in creating your assessment. These additional details could be guiding the Design Assistant on particular topics to focus on, a specific audience, or style instructions about which tone to use.
Select Generate question pool. Your Design Assistant generates the questions for your assessment. It may generate more questions than will actually be in the assessment so that learners get different questions if they retake it. Depending on the number of objectives, questions per objective, and types of questions, it may take several minutes to generate a question bank for you to review.
- Review each question to ensure they are testing the right skills and that the answers look correct. Use the Next and Previous question buttons to switch between the questions. For each question, you can:
- Delete it. Select Delete at the question level.
- Generate a new question. Select Regenerate. At the prompt, choose why you want to regenerate the question. This helps the Design Assistant generate a more accurate question based on your specifications.
- Edit questions or answers. Select Edit. When you edit a question, you can:
- Change the difficulty rating of that question. Select from the difficulty drop-down.
- Add more answer options. Select Add answer option to add another answer option to the list.
- Remove answers. Select Delete next to an answer to remove it.
- Edit the question or answer text by typing in the box.
- Switch the associated learning objective. Use the drop-down at the top to change which learning objective the question falls under.
- After you make changes to each question, select Save before moving onto the next question.
When all you questions are set, from the left navigation bar, select Source Content. Choose which knowledge sources you want to be applied to your assessment. The Design Assistant can recommend knowledge sources that would be relevant and useful. In addition, when you upload knowledge sources, the Design Assistant can use them to answer queries.
- From the left navigation bar, select Content Details. Content details are the metadata tags that Percipio uses to categorize the assessment in search results and reports. These details help learners find your assessment in Percipio and help admins distinguish it in reports. Provide information for the following fields:
- Title: This is the title that learners see when browsing for Skill Benchmarks.
- Description: This is the description that learners see when browsing for Skill Benchmarks.
- Expertise Level: The level of difficulty of the assessment, either Beginner, Intermediate or Advanced.
- Duration: How long the assessment is expected to take based on the number and difficulty level of questions.
- Image: Choose an image for the content card of the assessment.
- Alt text (optional): Optionally add alternate text to describe the image you uploaded.
- Technology type (optional): If the assessment is about a technology such as Microsoft, enter it here.
- Technology version (optional): If the assessment is about a particular level of technology such as Microsoft 365, enter it here.
- Skills (optional): If the Skill Benchmark is intermediate or advanced and requires prior knowledge, choose what skill learners should know to take the assessment. For example, an advanced Python assessment requires basic Python knowledge.
From the left navigation bar select Content Recommendations. Add Percipio content that is relevant to your assessment to help learners practice the skills needed to succeed on the assessment.
- At the top of the Question Generation page you see the skill and profiency level for the assessment. You can select the edit icon
- Now that your assessment is complete, you can:
- Exit: This saves your assessment as a draft that you can return to later.
- Publish: This publishes your assessment to your Percipio site for learners to see.
Duplicate an assessment
You might want to duplicate content if you want all the same criteria except for one or two minor changes, or if you are working with a group to refine and you want to try out different combinations. Only users with editor privileges can duplicate content in a project.
To duplicate content:
- Find the content from a list, either from the Apps page, Project page, or Content items page.
- From the action menu of the content item, select Duplicate. A copy is created in the same workspace and project as the original.
- Edit the copy to make any necessary adjustments.
Archive an assessment
If you no longer need content, you can archive it so it no longer shows on page lists. Only users with editor privileges can archive content in a project. Archived content shows on the Archive items list located from your profile drop down.
To archive content:
- Find the content from a list, either from the Apps page, Project page, or Content items page.
- From the action menu of the content item, select Archive. The item is moved to the Archived items list.
- You can view the Archive items list from your profile.
Restore an archived assessment
If you need to restore archived content, you can. To restore archived content:
- From your profile drop down, select Archived items.
- Find the content from a list.
- From the action menu of the content item, select Restore. The item is moved back to an active status and shows on the Content list, the main app's page, and the Project list. Once an item is restored you can edit it.
Move an assessment
If you need to relocate content, you can move it to a different workspace or project. To move content:
- Find the content from a list, either from the Apps page, Project page, or Content items page.
- From the action menu of the content item, select Move.
- In the dialog box that displays, select from the list the workspace or project that the item should be moved to.
- Select Move. The item is moved to the new location.