Manage CAISY™ for Conversations
You can edit, delete, and archive simulations to keep your content on LX Design Studio current. You can also move and duplicate simulations to further collaborate and access across team members.
Find a simulation
You can find content from three separate locations, the main app page, the Content item page, or the Project page. The first thing to note, however, is your workspace. You can only find content if you are in the selected workspace. To find a specific simulation:
- Open the page:
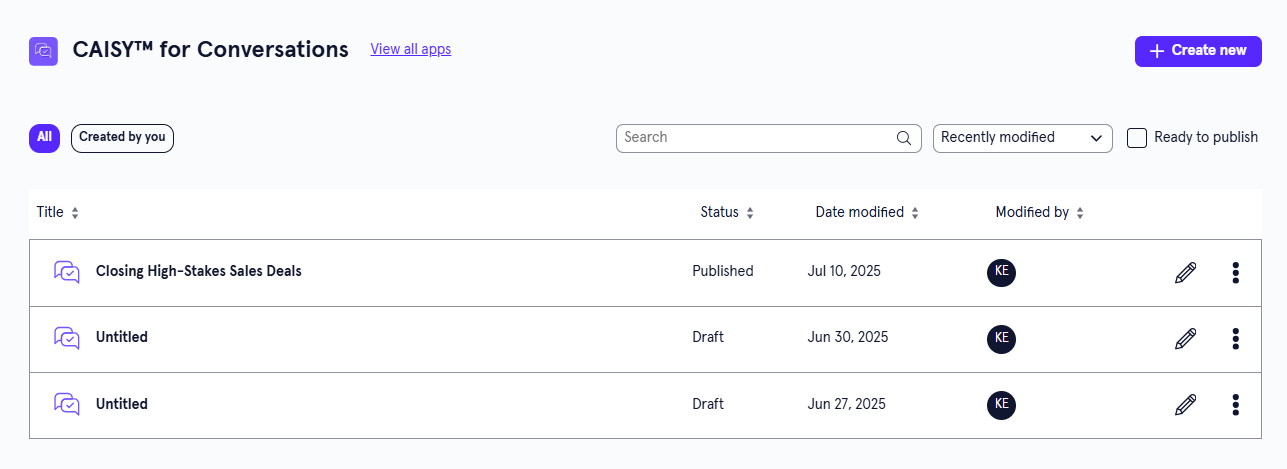
- Main app page: From the Home page or Apps page, select CAISY for Conversations. You now see the CAISY for Conversations page.
- Content items page: From the left navigation bar , select Content items.
- Project page:From the left navigation bar, select Projects, then select the project containing the item.
- Main app page: From the Home page or Apps page, select CAISY for Conversations. You now see the CAISY for Conversations page.
- You can do one of the following to find a simulation on any of the pages:
- Search for a specific one. If you know the name of the content you are looking for, you can use the search bar to locate it.
- Change the order of how the content displays in the list:
- Use the drop-down to order by date modified.
- Sort the column headings to order by Status, Date modified, or Modified by.
- Use the filters at the top to narrow the list. Depending on the page, some options may include:
- Viewing all content, or just the ones created by you.
- Show only content that is ready to publish
- Status or type
Manage a simulation
Depending on your permissions and the status of the content, you may see the following actions to the right or under the Show options menu for each:
- Edit: Opens the content so you can make any changes to the details. For more detailed information on editing content, see:
- Preview: Opens the content in the learner view so you can ensure it works as expected.
- Duplicate: Creates a copy of the content in the same project so you can update it without impacting the original.
- Archive: If the content has already been published, you can archive it so that you no longer see it in your Projects, Apps, or Content Items pages. It is moved to a separate Archived Items page. You can access all archived content from your profile drop down. The archived content is still available to learners in Percipio unless you retire it from your Percipio site.
- Move: Moves the content to a different project or workspace.
- Delete: If a content item is still in a draft status, you can delete it from LX Design Studio. When you delete content it is moved to a Deleted Items page. You can access all deleted items for up to 30 days from your profile drop down.
Edit a simulation
To edit a simulation:
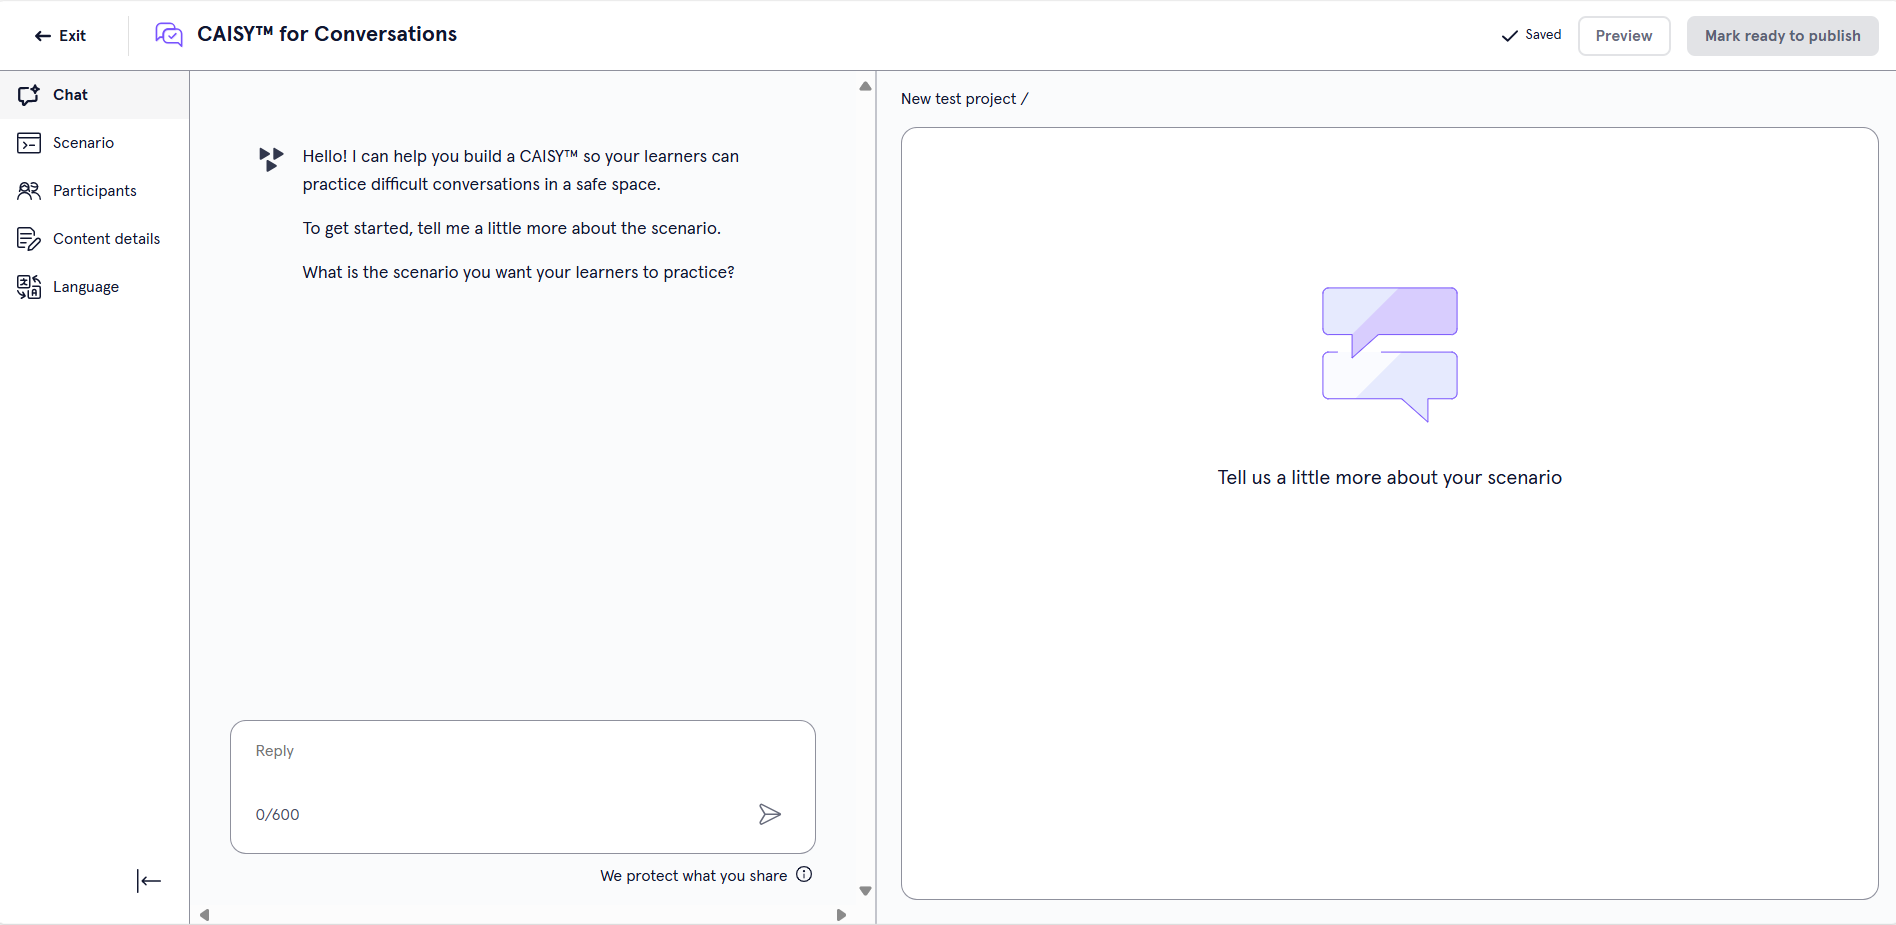
- Find the simulation you want to edit and select the edit icon
 . The Design Assistant opens with your previous conversation. If you previously generated a simulation, you see the sample conversation in the right pane, otherwise, you see the design brief in the right pane.
 - You can either continue the conversation in the Design Assistant or from the left navigation bar, select one of the areas in which to make your changes. If you already generated a simulation, we recommend at this point, that you select an area to edit instead of continuing with the Design Assistant because you have more control and refinement on what you change.
- Scenario: If you edit any information on the Scenario page, you must select Regenerate simulation. On the Scenario page you can edit the following fields:
- Scenario Category: Add a new category or select one from the list. To see if your category already exists, start typing to see if matches are found. The category is the broader topic or skill that learners using the simulation are trying to improve. This field displays to learners and is required.
- Scenario Prompt: The tool uses the answers you supply in this section to generate the sample simulation, so you should be specific and provide as much detail as possible.
- Default Behavior: Choose the default behavior that users see when they open your CAISY for Conversations. Users have the option to change the behavior before they start the simulation.
- Participants: On the Participants page you can edit the following fields:
- AI participant's role: Describe the role of the AI in your scenario, such as a customer, or a direct report.
- Learner's role: Describe the role of the learner in your scenario. The learner is the person interacting with the simulation.
- Introduction: Write the introduction that the AI Coach gives at the beginning of the scenario to set the scene for the learner.
- Content Details: On the Content Details page you can edit the following fields:
- Title: This is the title that displays to learners, so it should reflect the main topic of learning.
- Description: This is the description of the simulation that displays to learners when they are browsing content.
- Expertise Level: Choose either Beginner, Intermediate, Expert, or Everyone as the Expertise level in order to tailor the scenario to a specific level of learners.
- Duration: Set the time (in minutes) that you expect learners to spend on the scenario.
- Content Source: Content sources help learners discover your content and informs them about who created it.
- Language: Choose the Primary Language your simulation will display in. Learners have the option to take the simulation in any language supported by CAISY.
- Scenario: If you edit any information on the Scenario page, you must select Regenerate simulation. On the Scenario page you can edit the following fields:
- Review the sample simulation on the right and make any necessary changes.
- Once you are satisfied with the sample simulation generated on the right, your simulation is complete and you have the following options:
- Preview: This opens the simulation you just created so you can test it and ensure it works as expected.
- Exit: Be sure you see the word Saved in the upper right corner before you exit. When you exit, your simulation saves as a draft that you can return to at any time.
- Ready to Publish: If you do not have publishing privileges, you can mark your content as Ready to Publish to signify to creators with publishing privileges that it is ready to be shared with learners on Percipio.
- Publish: Only users with publishing privileges see this option. This publishes your simulation to Percipio so learners can see it. When you publish your simulation, it appears on the Custom Content page in Percipio. Organization administrators can then make it available to learners on its own, or add it to a channel or journey.
Duplicate a simulation
You might want to duplicate content if you want all the same criteria except for one or two minor changes, or if you are working with a group to refine and you want to try out different combinations. Only users with editor privileges can duplicate content in a project.
To duplicate content:
- Find the content from a list, either from the Apps page, Project page, or Content items page.
- From the action menu of the content item, select Duplicate. A copy is created in the same workspace and project as the original.
- Edit the copy to make any necessary adjustments.
Archive a simulation
If you no longer need content, you can archive it so it no longer shows on page lists. Only users with editor privileges can archive content in a project. Archived content shows on the Archive items list located from your profile drop down.
To archive content:
- Find the content from a list, either from the Apps page, Project page, or Content items page.
- From the action menu of the content item, select Archive. The item is moved to the Archived items list.
- You can view the Archive items list from your profile.
Restore an archived simulation
If you need to restore archived content, you can. To restore archived content:
- From your profile drop down, select Archived items.
- Find the content from a list.
- From the action menu of the content item, select Restore. The item is moved back to an active status and shows on the Content list, the main app's page, and the Project list. Once an item is restored you can edit it.
Move a simulation
If you need to relocate content, you can move it to a different workspace or project. To move content:
- Find the content from a list, either from the Apps page, Project page, or Content items page.
- From the action menu of the content item, select Move.
- In the dialog box that displays, select from the list the workspace or project that the item should be moved to.
- Select Move. The item is moved to the new location.