Create a Custom CAISY for Conversation
The CAISY for Conversations app allows you to create simulations in which learners practice difficult conversations by chatting with their AI coach.
Best practices for creating a custom simulation
When you create a custom simulation, we recommend the following:
- Define explicit objectives including expected responses or behaviors learners need to exhibit, for example, required greeting, phrasing, or outcomes because CAISY uses objectives to shape how it evaluates and guides the conversation.
- If you need constraints (tone, structure, sources), state them clearly for more consistent conversational flows.
- Choose scenarios where learners practice interactive, real-world conversations where the focus is on decision-making or exhibiting a specific behavior, not on static knowledge checks.
- After generating your initial scenario, we recommend editing your Scenario prompt instead of continuing to chat with the app's Design Assistant in order to keep your changes focused.
- Use specific terminology in your scenario prompt that you want the AI to use. For example: Use the term team member instead of employee if that is the standard practice for your organization.
- Add a company policy or other knowledge sources to further add specificity and guide the AI on content that should be covered during the simulation that is specific to your organization culture.
- Keep your scenario prompt as simple and straightforward as possible.
- Remember to design the simulation for a two-person interaction.
- Add images for actors that your learners can relate to.
- Iterate and refine your CAISY through testing with multiple different people.
- If you have a previously created custom CAISY for Conversation or a Skillsoft CAISY scenario that has the foundation of what you want to create, you can choose to start with that existing resource so you don't have to start from scratch.
Create a custom simulation
To create a simulation:
- From the Home page or Apps page, select CAISY for Conversations . You now see the CAISY for Conversations page.
- Select Create New.
- Choose a project for the CAISY for Conversations simulation you plan to create.
- Select Next.
- Before engaging with the Design Assistant, considering adding a knowledge source that the Design Assistant can use as reference material to help create the simulation with very specific points to your unique business needs. To add files that can be referenced:
- Select Add to add a new knowledge source to the content, project, or workspace.
- Locate the file you want to add as a knowledge source. This can be an file of type: .txt, .html, .pdf, .pptx, .xlsx, .csv, and .doc files, with a maximum size of 100MB per file.
- Select Next.
- Select whether the file should be accessible at the workspace, project, or content level. To help you determine the right level:
- Workspace level: The file is accessible across all projects and can be shared to other projects or workspaces later if needed. Use mostly for brand, legal, or voice guidelines.
- Project level: The file is accessible to all content items within your project and can be shared to other projects or workspaces later if needed. Use mostly for collaborating on project-specific content and standards.
- Content level: The file is applied only to specific content and cannot be shared later. It won't surface in search or be discoverable elsewhere in the platform. Use for highly tailored or one-off content.
- Select Next.
- Add a Title and Description. This helps you remember why you uploaded the content.
- Select Next.
- Select Next to confirm the file.
- Select Got it acknowledging that the file is being processed.
- By default, the Design Assistant displays. Choose one of three options to get started:
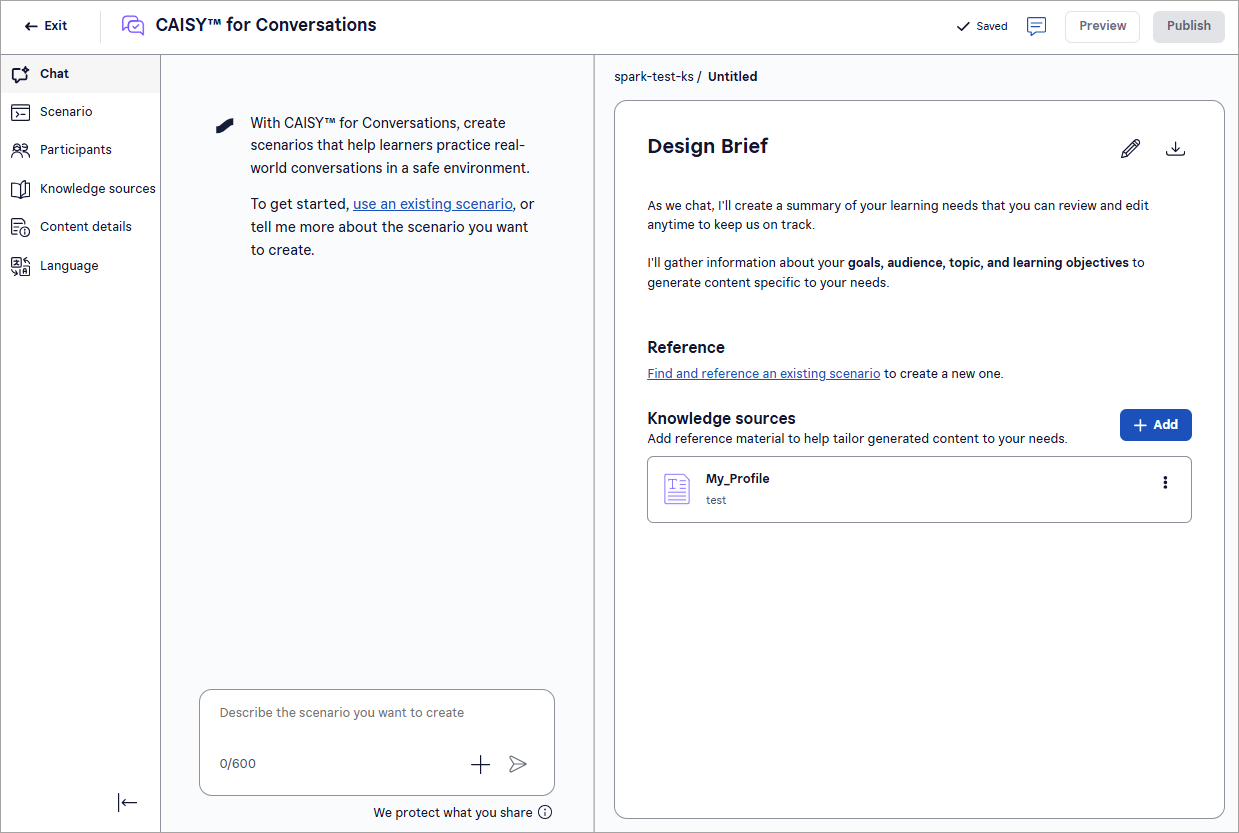
Use an existing scenario: Select this link to choose to start your scenario creation with an existing Skillsoft CAISY AI simulation or one you previously created. Search for and locate the CAISY from the list and select Use as reference. The Design Assistant extracts the information and populates your design brief. Make any adjustments by editing the design brief before proceeding.
- Use the Design Assistant. If you choose to use the Design Assistant, chat with the AI assistant to give details about your custom simulation. Answer each of the questions as specifically and with as much detail as possible. The Design Assistant uses your responses to complete the information on the Scenario, Participants, Content Details, and Language pages which you can edit later to ensure your simulation functions properly. When the Design Assistant has received enough information from you, it automatically generates a scenario. If you believe you provided enough information prior to that point, you can select the Generate scenario button.
Enter the information about your simulation on your own. If you choose to manually complete the information, from the left navigation bar, select Scenario. You must complete the following fields:
- Scenario Category: Add a new category or select one from the list. To see if your category already exists, start typing to see if matches are found. The category is the broader topic or skill that learners using the simulation are trying to improve. This field displays to learners and is required.
- Scenario Prompt: The tool uses the answers you supply in this section to generate the sample simulation, so you should be specific and provide as much detail as possible.
- Default Behavior: Choose the default behavior that users see when they open your CAISY for Conversations . Users have the option to change the behavior before they start the simulation.
-
Select Generate simulation to see a sample simulation display on the right. The Design Assistant populates the Participants, Content Details, and Language pages based on the description you already provided.
-
You can modify any of the information populated by AI. From the left navigation bar, you can change the Scenario, Participants, Content Details or Languages.
- Participants. This page has two tabs, Participants and Role-reversal participants. For each tab, you see the following fields:
- AI participant's role: Describe the role of the AI in your scenario, such as a customer, or a direct report.
- Learner's role: Describe the role of the learner in your scenario. The learner is the person interacting with the simulation.
- Introduction: Write the introduction that the AI Coach gives at the beginning of the scenario to set the scene for the learner.
You can choose which persona the AI participant role assumes and you can add new personas with your own images to reflect your company brand and culture. The learner's role assumes the learner's profile picture when they launch the simulation.
- Scenario: If something in the sample simulation is incorrect, you can change any of the information you provided on the Scenario page. You must Regenerate simulation if you change anything on this page before you can preview or publish.
- Scenario Category: Add a new category or select one from the list. To see if your category already exists, start typing to see if matches are found. The category is the broader topic or skill that learners using the simulation are trying to improve. This field displays to learners and is required.
- Scenario Prompt: The tool uses the answers you supply in this section to generate the sample simulation, so you should be specific and provide as much detail as possible.
- Default Behavior: Choose the default behavior that users see when they open your CAISY for Conversations . Users have the option to change the behavior before they start the simulation.
- Content Details: Content details are the metadata tags that the platform uses to categorize the content in search results and reports. These details help learners find your simulation in the Skillsoft Platform and help admins distinguish it in reports. Provide information for the following fields:
- Title: This is the title that displays to learners, so it should reflect the main topic of learning.
- Description: This is the description of the simulation that displays to learners when they are browsing content.
- Expertise Level: Choose either Beginner, Intermediate, Expert, or Everyone as the Expertise level in order to tailor the scenario to a specific level of learners.
- Duration: Set the time (in minutes) that you expect learners to spend on the scenario.
- Content Source: Content sources help learners discover your content and informs them about who created it.
- Language. Choose the Primary Language your simulation displays in. Learners have the option to take the simulation in any language supported by CAISY.
- Participants. This page has two tabs, Participants and Role-reversal participants. For each tab, you see the following fields:
- If you changed any information on the Scenario tab, you must regenerate before your simulation is complete. Once you are satisfied with all the details, your simulation is complete and you have the following options:
- Preview: This opens the simulation you just created so you can test it and ensure it works as expected.
- Exit: Be sure you see the word Saved in the upper right corner before you exit. When you exit, your simulation saves as a draft that you can return to at any time.
- Ready to Publish: If you do not have publishing privileges, you can mark your content as Ready to Publish to signify to creators with publishing privileges that it is ready to be shared with learners on the platform.
- Publish: Note, you only see this option if you have LX Design Studio publishing privileges. This option publishes your content to the platform. You can make it available to a specific group of learners via search only, or add it to a channel or journey.
- Select Publish.
- Check the box: I also want to make this available to learners right away. Ensure the users who should see your draft content are included in an audience. See Create audience for details on how to create an audience and add users.
- Select Select learners, and then choose your audience from the list. By default all users in your company are selected.
- Select Save.
- Select Publish again. When you publish content, it shows in the Manage Content Items list in the platform.
- Select Go to Percipio. You see your new content in the list. People in the audience you selected should be able to search on your content title to find it. At this point they cannot browse to it.
- If you want, you can also add your new content to a channel or journey and make that channel or journey available to a select audience of reviewers that can test the new content to make sure it meets organization standards. Visit the Create Custom Journey or Create Custom Channel pages for more information on how to add custom content to a channel or journey and entitle it for just one audience.