Manage CAISY™ for Presentations
You can edit, delete, and archive presentations to keep your library current. You can also move and duplicate presentations to help your team access them and coordinate for refining them.
Find a presentation
- From the Home page or Apps page, select CAISY for Presentations. You now see the CAISY for Presentations list page.
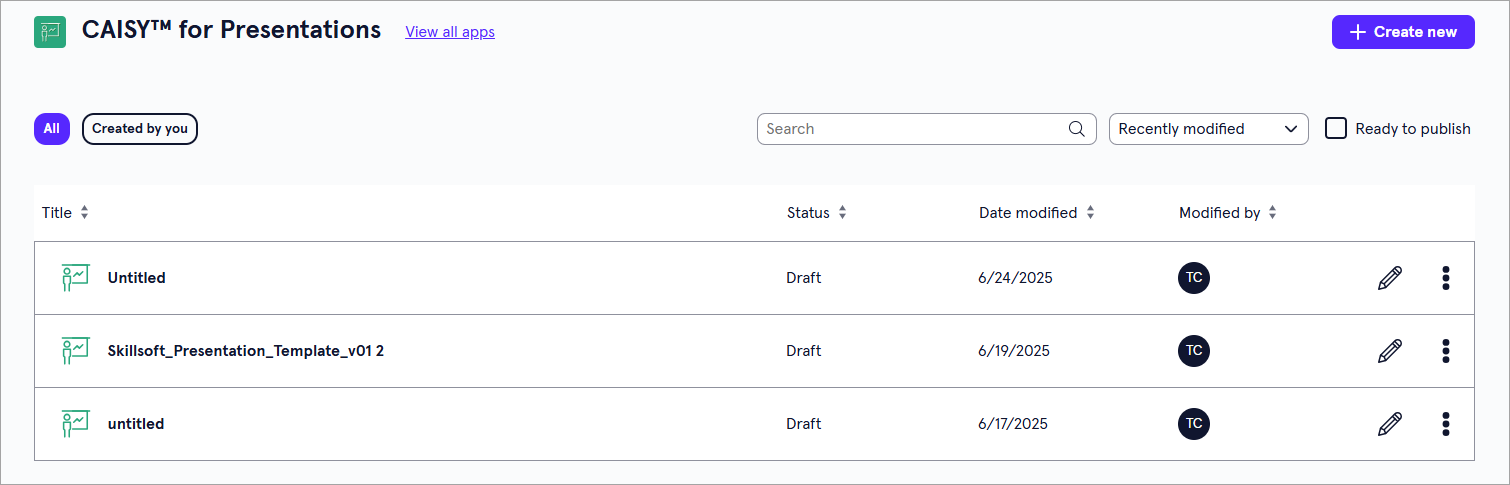
- You can do one of the following to find a presentation:
- Search for a specific presentation. If you know the name of the presentation you are looking for, you can use the search bar to locate it.
- Change the order of how presentations display in the list:
- Sort the column headings by Status, Date modified, or Modified by.
- Toggle between viewing all presentations, or just the ones created by you.
Manage a presentation
Depending on your permissions and the status of the content, you may see the following actions to the right or under the Show options menu for each:
- Edit: Opens the content so you can make any changes to the details. For more detailed information on editing content, see:
- Preview: Opens the content in the learner view so you can ensure it works as expected.
- Duplicate: Creates a copy of the content in the same project so you can update it without impacting the original.
- Archive: If the content has already been published, you can archive it so that you no longer see it in your Projects, Apps, or Content Items pages. It is moved to a separate Archived Items page. You can access all archived content from your profile drop down. The archived content is still available to learners in Percipio unless you retire it from your Percipio site.
- Move: Moves the content to a different project or workspace.
- Delete: If a content item is still in a draft status, you can delete it from LX Design Studio. When you delete content it is moved to a Deleted Items page. You can access all deleted items for up to 30 days from your profile drop down.
Edit a presentation
To edit a presentation:
- From the CAISY for Presentations or the Content items page, locate the presentation you want to edit and select the edit icon
 . The editing interface displays showing the presentation along with access to all areas for editing, including:
- Content details
- Attendee questions
- Evaluation criteria
- Content language
-
Edit the pieces of the presentation you need.
 Edit content details
You can change the title and description of the presentation. This is what the learner sees when you publish the content to Percipio. These are also used to determine the value of meta data tags in Percipio.
To change the content details:
- Ensure Content detail is selected from the left navigation.
- Edit one or both fields:
- Title: By default this is the name of the presentation file you uploaded. Change it to what makes sense.
- Description: Revise the description to meet the expectations of your learners.
- Changes are saved automatically. You do not need to confirm these updates.
Edit attendees and questions
You can change the attendee groups, attendees, and the questions they ask.
To get started, navigate to the Attendee question page. You can either:
- From the left navigation, select Attendee questions
- Select Update from the Attendee question box on the Content details page.
For any change you make to this page, you must Confirm updates before you can preview or publish.
To add and create a new attendee group:
If you don't see an existing attendee group that meets your requirements, you can create a new one.
- Select Add attendee group > Create new attendee group
- Give your group a name.
- Browse through the list of system-provided personas and choose the ones you want to be in your group.
- Select Add to save changes.
To add an existing group:
If you have an attendee group already created, you can add it to your presentation simulation.
- Select Add attendee group > Select from existing groups.
- Select an attendee group from the dropdown list.
- Select Add.
Remove an existing attendee group:
- Select any current attendee group from the tabs at the top.
- Expand the Attendee section.
- Select Delete attendee group remove the attendee group. If any attendee has associated questions, you cannot remove the group until you remove or reassign the question.
Add or remove attendees from an existing group.
- Select any current attendee group from the tabs at the top.
- Expand the Attendee section.
- Select Edit attendee group to open the list of available attendees.
- Select and unselect members from the list. Select View bio next to any attendee to see a description of their character. The learner also sees these descriptions when taking the presentation so they can cater their presentation to the specific audience.
- Select Update to save the attendees in that group.
To add or remove selected slides:
- Select any current attendee group from the tabs at the top.
- Expand the Slides section. Selected slides have a highlight around them.
- Click on a slide to select it for a question or click a highlighted slide to remove it. You can only remove slides that have no questions associated to them.
- You must Confirm updates before you can preview or publish.
To edit questions:
- Select the attendee group from the tabs at the top.
- Expand the Questions section of the page. You can edit existing questions, remove questions, or add questions for each slide. For each slide selected, specify the following information:
- Question from attendee: Type out the question that you would like the attendee to ask the presenter.
- Guidelines for the presenter's response: Create the desired response of the presenter. These guidelines are used to evaluate the presenter's response.
- Who asks the question: Select the specific attendee from the chosen group that you want to ask the question.
- You must Confirm updates before you can preview or publish.
Edit sections and evaluation criteria
You can change the sections and the evaluation criteria for each section.
To make changes, navigate to the Evaluation criteria page. You can either:
- From the left navigation, select Evaluation criteria
- Select Update from the Evaluation criteria box on the Content details page.
When you are on the Evaluation criteria page, you can:
- Add, delete, or edit sections
- For each section add or remove criteria.
To add sections:
- Expand the Sections section.
- In Section 1, give the section a name.
- The From slide starts at slide 1. In the To slide, choose the last slide in that section. If it is not the last slide of the presentation, a new section is automatically created starting with the next slide number.
- In Section 2, give the section a name.
- Choose the last slide in that section. Continue in this manner until you have added all sections you want.
- If the last section acts like an appendix that the learner does not need to be evaluated on, you can select the check box at the top: This deck includes an appendix at the end, which will not be evaluated.
- You must Confirm updates before you can preview or publish
To delete a section:
- Expand the Sections section.
- Locate the section you want to delete, select the trash can icon to delete it. When you delete a section, the slides from that section get incorporated into the previous section.
To modify sections:
- Expand the Sections section.
- Locate the section to modify. You can change the section name or the To slide.
- When you change the To slide, the subsequent section From slide is automatically updated. Continue in this manner until you have the sections defined as you want them.
- If the last section acts like an appendix that the learner does not need to be evaluated on, you can select the check box at the top: This deck includes an appendix at the end, which will not be evaluated.
- You must Confirm updates before you can preview or publish
To modify criteria for a section:
- Expand the Evaluation criteria section.
- Choose the Section from the header across the top.
- For each criterion in a criteria set, you can:
- Change the weight of a criteria. The total weight of all criteria in a set has to total 100%. Criterion with more points make up a larger portion of the overall grade.
- Add criteria. Select Add criteria and provide a name and a weight. Criteria may be as simple as grammar, or knowledge of the material, or may be as detailed as giving certain vocabulary the user must include.
- Remove criteria. Select the trash can icon next to the criteria. You can remove any criteria you added. You cannot remove any default Delivery style criteria, but you can change their weight.
- You must Confirm updates before you can preview or publish
Edit the language
You can change the language of the simulation including the title, description, attendees, and questions. When you change the language of the simulation, the presentation file is not translated.
To change the language:
- From the left navigation, select Content Language.
- From the language drop down, select the new language.
- You can choose to let AI translate and update your settings or you can do it manually by going through each item.
- After you update the title, description, attendees and their questions, you need to Confirm update before you can publish. The system automatically saves your changes as you go through. You can exit any time without losing your work.
- Once you have completed all required fields and confirmed updates, you have the following options:
- Preview: Opens the CAISY for Presentations you just created so that you can try it for yourself and ensure it works as expected.
- Publish: Publishes your presentation to Percipio so learners can see it. When you publish your presentation it appears on the Custom Content page in Percipio. You can make it available to learners on its own, or add it to a channel or journey. Note, you only see this option if you have LX Design Studio publishing privileges.
- Exit: Be sure you see the word Saved in the upper right corner before you exit. When you exit, your presentation saves as a draft that you can return to at any time.
Duplicate a presentation
You might want to duplicate content if you want all the same criteria except for one or two minor changes, or if you are working with a group to refine and you want to try out different combinations. Only users with editor privileges can duplicate content in a project.
To duplicate content:
- Find the content from a list, either from the Apps page, Project page, or Content items page.
- From the action menu of the content item, select Duplicate. A copy is created in the same workspace and project as the original.
- Edit the copy to make any necessary adjustments.
Archive a presentation
If you no longer need content, you can archive it so it no longer shows on page lists. Only users with editor privileges can archive content in a project. Archived content shows on the Archive items list located from your profile drop down.
To archive content:
- Find the content from a list, either from the Apps page, Project page, or Content items page.
- From the action menu of the content item, select Archive. The item is moved to the Archived items list.
- You can view the Archive items list from your profile.
Restore an archived presentation
If you need to restore archived content, you can. To restore archived content:
- From your profile drop down, select Archived items.
- Find the content from a list.
- From the action menu of the content item, select Restore. The item is moved back to an active status and shows on the Content list, the main app's page, and the Project list. Once an item is restored you can edit it.
Move a presentation
If you need to relocate content, you can move it to a different workspace or project. To move content:
- Find the content from a list, either from the Apps page, Project page, or Content items page.
- From the action menu of the content item, select Move.
- In the dialog box that displays, select from the list the workspace or project that the item should be moved to.
- Select Move. The item is moved to the new location.