Previous Topic

Next Topic

Book Contents

Book Index

Custom Installation

This option also allows you to select which components to install and to customize the properties files for the Skillsoft Course Player, Skillsoft Mobile Player, Simulation Player, and SCM using the Properties Tool.
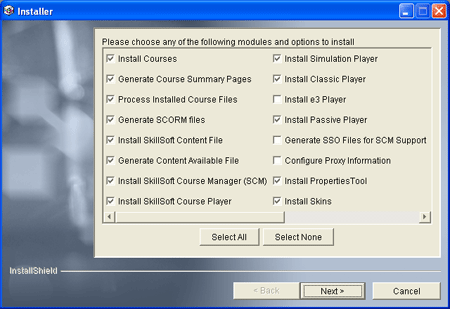
  1. At the Select Modules and Options screen, select the desired installation options. You can use the Select All and Select None buttons to select or deselect all available options.

    custom installation step 1

    Installer Options descriptions

  2. Click Next to continue.
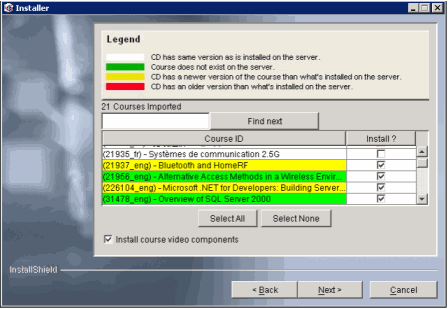
  3. If you selected Install Courses in the Select Options and Modules list, the Select Courses to Install screen displays. The courses available for installation appear in a color-coded list that indicates its status:

    custom installation course selection screen

    Color

    Status

    Green

    The course on the Installation CD is NOT on the server. (default=selected)

    Yellow

    The course on the Installation CD is NEWER than the version on the server. (default=selected)

    Red

    The course on the Installation CD is OLDER than the version on the server. (default=not selected)

    White

    The course on the Installation CD is the SAME as the version on the server. (default=not selected)

    Note: By default, green and yellow courses will be selected for installation. To install a red or white course, you will need to manually select it.

  4. To select or search for courses, do one of the following:
    1. Enter key words or search terms and then click Find Next.

      The courses appear in the Course ID box below. If no courses match your search, a Not Found message displays.
    2. Click the check boxes next to the courses you want to install or use the Select All option to choose all languages.
    3. Use the Select None option to deselect the entire list.
  5. Certain courses contain video components. Click the check box to Install course video components to install these along with the course. A static image will display in place of video if you choose not to install these video components.
  6. Once you have made your course selections, click Next to continue.
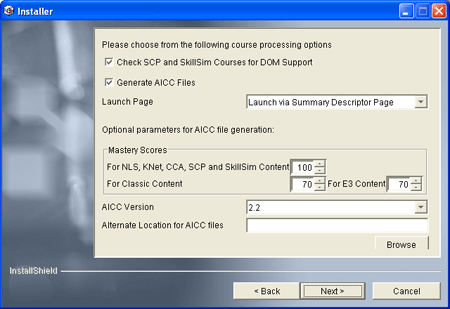
  7. If you selected Process Installed Course Files, you have the choice of the following options:

    custom installation step 5

    Option

    Description

    Check SCP and SkillSim Course for DOM Support

    Check for DOM/508 support in the splash/front-end pages of your SCP and SkillSims courses. If these pages do not have DOM support, the Installer adds DOM/508 support (default=selected).

    Generate AICC Files

    Generate AICC files for all your applicable courses (default=selected).

    Launch Page

    Select Launch directly into the course to have courses launched without a summary descriptor page or select Launch via Summary Descriptor Page to have applicable courses launched through a summary descriptor page.

    Mastery Scores

    If you selected the Generate AICC Files option, select the minimum passable Mastery scores for SCP, CCA content, SkillSim content, Classic content, and e3 content.

    AICC version

    Select an AICC version from the AICC version drop-down list box. The options to choose from are AICC version 2.2 and AICC version 3.5.

    Alternate Location for AICC files

    The Installer allows you to set an alternate location to install AICC files. The Installer, by default, installs the AICC files to the \aicc folder at the top level of each course folder on the server (the folder is immediately below the course ID folder e.g., COMM0606\aicc\ or CUST0100\aicc) with the exception of e3 and Classic (refer to the table below). If you want AICC files installed in an alternate location, click the Browse button and navigate to the location where you want these files to be installed. If you select an alternate location, the files will be copied to the alternate directory and will remain in the default directory as well.

    The course types that will copy AICC files to an alternate output directory are the following:

    Course Type

    Default AICC File Location In Course

    Business Skills

    <course dir>\aicc\*.*

    SkillSims

    <course dir>\aicc\*.*

    Classic

    <course dir>\aicc_<course dir name>.*

    e3

    <course dir>\metadata\<course locale>\aicc_<course dir name>.*

    CCA

    <course dir>\aicc\*.*


  8. Click Next to continue.
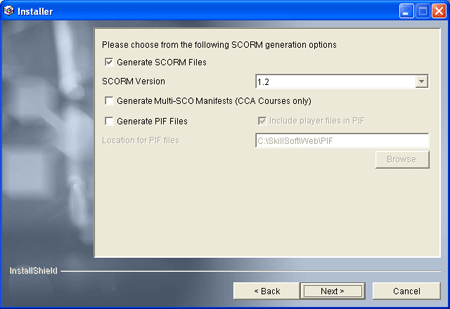
  9. If you selected Generate SCORM files, you have the choice of the following options:

    custom installation step 7

    Complete list of SCORM generation options

    Note: You must set the USE_SCORM_API parameter to TRUE in the PagePlayer.properties file to enable SCORM communications.
  10. If not generating SCORM PIF files, SkillSoft recommends accepting the default settings which will install all versions of the player.
  11. Click Next to continue.
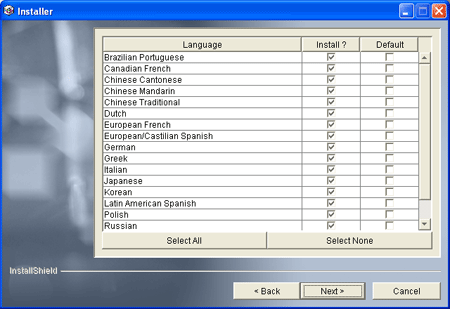
  12. If you selected Install Skillsoft Course Player, Install Skillsoft Mobile Player, or Install Skillsoft Course Manager (SCM) in the Select Options and Module Screen, you are to select the languages for installation. The Player and SCM are capable of playing courses in several different languages.
    custom installation sterp 9
    1. Select the languages for installation. Click the checkboxes next to the languages you want to install or use the Select All option to choose all languages. Use the Select None option to deselect the entire list.
    2. Set the installation's default language. Select the default checkbox next to the language you want as the default. You can only select one default language.

      Note: The selected default language determines the language of the course list index.html page, the SCM download pages, and the default language in the SCM download language selection list. The language of the course determines the language of the course summary pages and Skillsoft Course Player interface. The language selected by the user when the SCM is downloaded determines the language of the SCM interface.
    3. Click Next to accept your selections and continue.
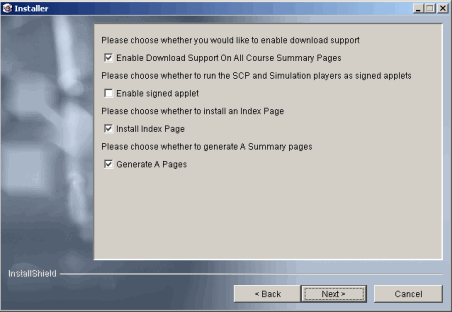
  13. If you are installing the SCM, select Enable Download Support On All Course Summary Pages to create a link on all course summary pages to download that course to a learner's local machine. If the learner does not have the SCM downloaded, they are then prompted to download the SCM first (default=selected).
    custom installation step 10
  14. Click Next to accept your selections and continue.
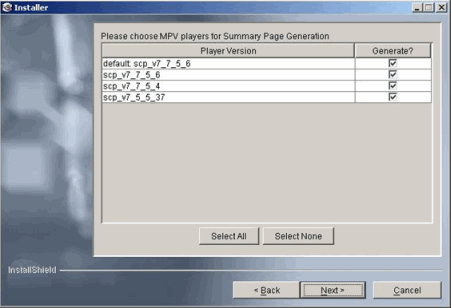
  15. In a custom installation process where an alternate player is already installed, select whether or not to generate summary pages for the default and/or any alternate players.

    Install screen with MPV player summary pages

    Note: In an alternative player installation process, the above panel will not be displayed, but instead summary pages will only be generated for the alternate player that is being installed. Summary pages will not be generated for the default or any other existing alternate players.
  16. Click Next to accept your entries and continue.
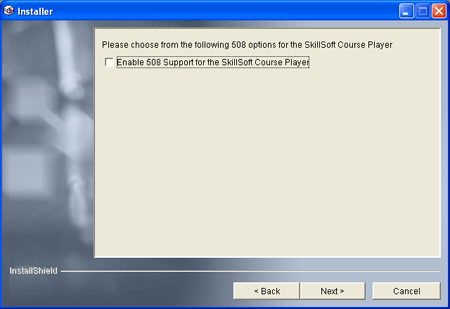
  17. If you selected Install Skillsoft Course Player, select or deselect the Enable 508 Support for the Skillsoft Course Player checkbox to allow users the ability to choose 508 technologies when playing courses (default=not selected).

    custom installation step 12

  18. Click Next to accept your selection and continue.
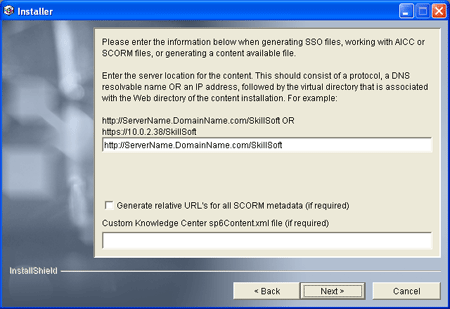
  19. If you selected Generate SSO Files for SCM Support or Process Installed Course Files in the Select Options screen, enter your content server location.
  20. Follow the instructions on the screen and click Next to continue.

    csuomt installation step 15

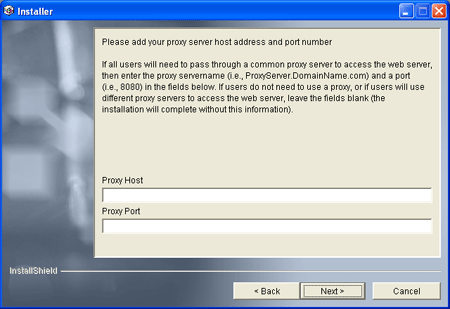
  21. If you selected Configure Proxy Settings, the Modify Proxy Setting screen displays. If all users need to pass through a common proxy server to access the web server, follow the on-screen instructions to enter a Proxy Host and Proxy Port.
  22. If users do not need to use a proxy, or if users will use different proxy servers to access the web server, leave the fields blank (the installation will complete without this information).

    custom installation step17

  23. Click Next to accept your entries and continue.
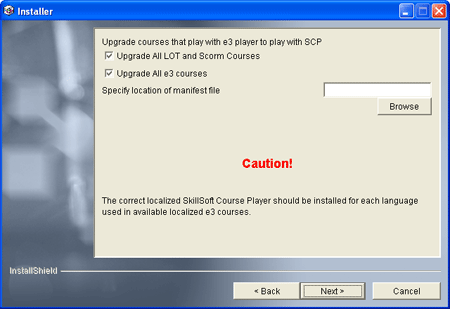
  24. If you selected Upgrade courses that play with e3 player to play with SCP in the Select Options screen, select or deselect the appropriate options:

    custom installation step 19

    Option

    Description

    Upgrade All LOT and SCORM Courses

    Upgrade all LOT and SCORM courses to play with the SkillSoft Course Player.
    (default= selected)

    Upgrade All e3 Courses

    Upgrade all e3 courses to play with the Skillsoft Course Player.
    (default= selected)

    Specify location of manifest file

    Enter the location of your manifest file in the field or browse to the location of the manifest file by clicking the Browse button. The manifest file contains a list of course ids of the courses that you want to upgrade. The manifest file contains a list of course ids of the course that you want to upgrade. The manifest file can specify if a course is LOT or e3 and can also specify the path to the spcsf.

    Note: Leave this field blank if you have not created a manifest file to use in upgrading courses.

  25. Click Next to accept your selections and continue.
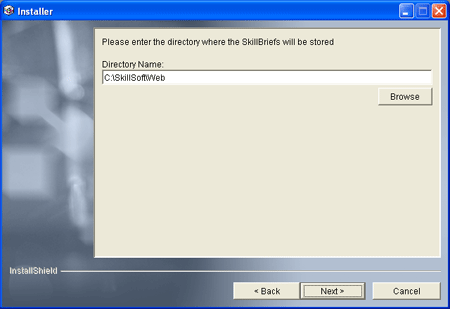
  26. If you selected Install SkillBrief Repository in the Select Options screen, then the Install SkillBrief screen displays. Enter the directory name to your local path where you want the SkillBriefs to reside.

    custom install step 21

  27. Click Next to continue.
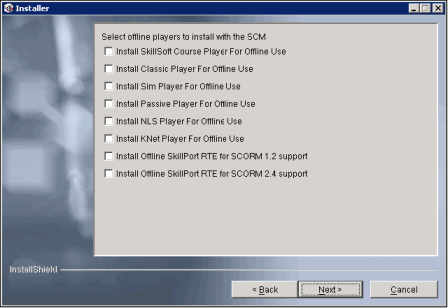
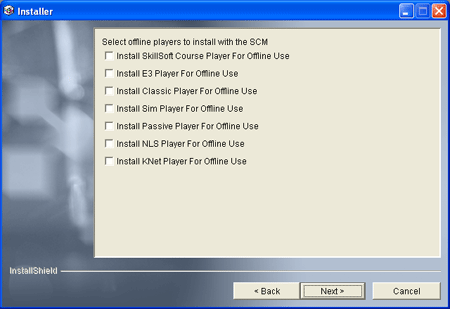
  28. If you selected Install Skillsoft Course Manager (SCM) in the Select Options screen, select which players to install for offline play. Click Next to accept your selections and continue.

    Custom Installation step 23

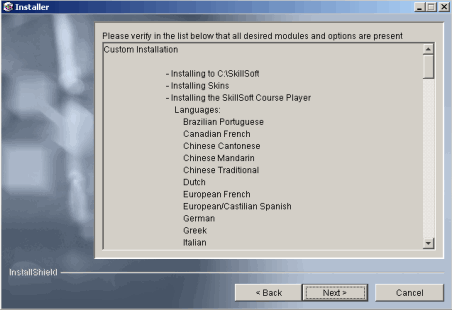
  29. The Selected Options screen displays. Use the scroll bar to review the entire options list.
    custom install step24

    CI custom installation verification screen

  30. The Installer installs the selected software to the content server directory that you selected. A log file is created in the /Logs folder of your content server directory (format: Installer_yyyy-mm-dd).

    Note: If prompted, click the Yes button or the Yes to All button to overwrite any existing files.

  31. Click Finish to exit the installation program.