Projects
Projects serve as folders that contain content. They help organize your custom content and allow you to manage who has access to it. Projects are associated with a specific workspace, and have access to the knowledge sources from that workspace. When you create a project in a workspace, only you can see it until you share it with others.
Project roles
If you are a site admin of the platform and have the privilege to access LX Design Studio, you also have admin level permissions to LX Design Studio. As an admin of LX Design Studio you can see and manage all workspaces and projects from the Admin dashboard.
If your platform role is something other than site admin, and you have privileges to LX Design Studio, you are not an administrator in LX Design Studio. You are the owner of your default workspace and those you create, but you can only access other workspaces and projects to which you have been added as a member. When you are added as a member, you may have view or edit privileges.
If you are not an administrator in LX Design Studio, you may have a different role in different projects. The role you have at the project level is independent of your role within the workspace. The following roles exist in projects:
- Viewer: A project viewer can see shared projects in a workspace. They can create new content in the project, but they can only view existing content.
- Editor: A project editor can see shared projects in a workspace. They can create new content in a project and they can edit, duplicate, archive, and move existing content within the project. Editors can share the project with others, rename, and delete it.
Depending on your role on a project, you may have different options available to you under the Show options menu.
- As a project viewer, you can:
- As a project editor, you have all the abilities of a viewer plus you can:
Manage projects
On the Projects page, you see a list of all projects in that workspace that you have access to. To find a specific project, you can locate it from the list of projects or search for it using the search bar in the upper left.
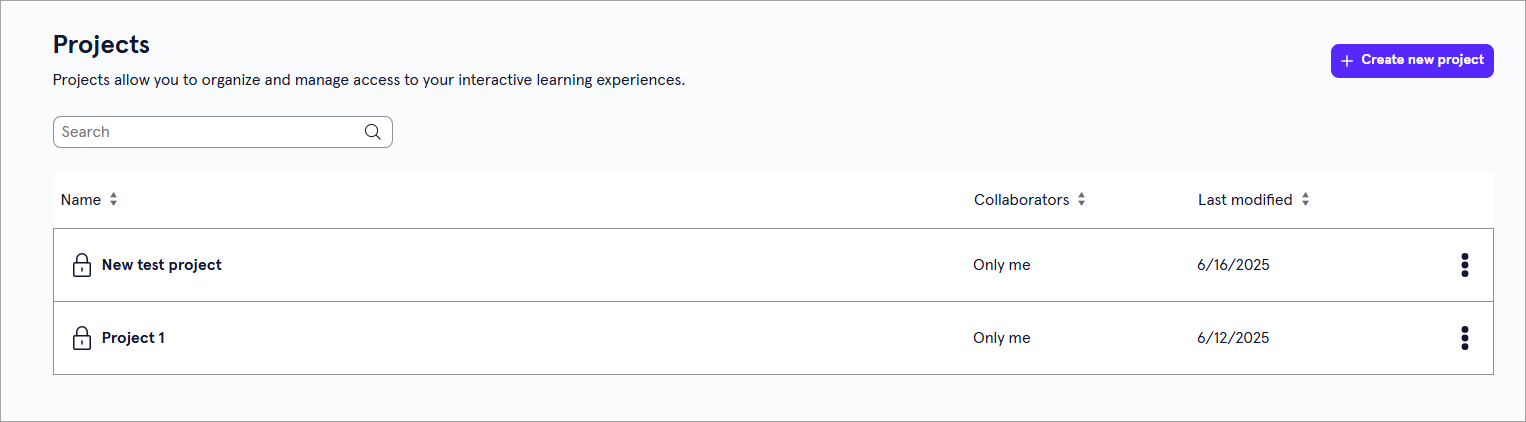
Select the Project options icon next to a project to see the following options:
- View Project: Select View Project to open the project folder and see the content it contains. From here, you can
- Rename: Select Rename to give the project a different name.
- Share Project: Invite others to collaborate on your project.
- Delete: Select Delete to delete the project from that workspace. A project can only be deleted if it does not contain any content items.
Create a project
If you are an owner or editor of a workspace, you can create projects. To create a new project:
- From the left navigation bar, select Projects. You now see the Projects page.
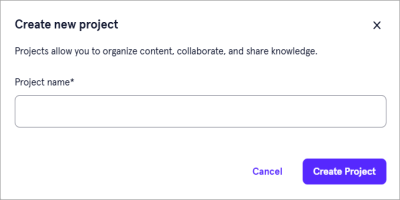
- Select Create new project from the upper right corner of the page.
- Give your project a Name.
- Select Create Project.
View a project
If you have a role of viewer or editor of a project, you can view the contents of the project.
To view a project's content:
- From the left navigation bar, select Projects. You now see the Projects page.
- Locate the project you want toview, either by scrolling through the list or searching for it.
- Select the Project options icon, and then View Project. The project details display.
- If you have viewer only privileges, you can preview any content. If you edit privileges, you can preview, move, edit, archive, and duplicate content within the project.
Add content to a project
There are two different ways to add content to a project. You can create new content in the project from the Projects page, or you can create content from one of the Apps and add it to a project. A user with a role of viewer or editor can create new content in a project.
To create content in the project from the Projects page:
- From the left navigation bar, select Projects. You now see the Projects page.
- Locate the project you want to add content to, either by scrolling through the list or searching for it.
- Select the Project options icon, and then View Project.
- Select Create new from the upper right corner.
- Select which type of content you want to add to your project.
- Continue with creating your custom content. For more information on creating custom content, visit the following pages:
To create content from an app and add it to a project:
- From the Home page or the Apps page, select the app for the type of content you want to create.
- Select Create new from the upper right corner of the page.
- Select a project to contain the new content.
- Select Next.
- Continue with creating your custom content. For more information on creating custom content, visit the following pages:
Add a knowledge source to a project
When you add a knowledge source at the project level, it can only be accessed by collaborators on that project, and is only applied when creating content in that project. Examples of types of knowledge sources you may want to add to project include, project charters or business cases. The Design Assistant can recommend knowledge sources that would be relevant and useful. In addition, when you upload knowledge sources, the Design Assistant can use them to answer queries.
To add a knowledge source to a project:
- From the left navigation bar, select Projects.
- Locate the project you want to add a knowledge source to. From the Project options menu, select View project.
- Select to view the Project Knowledge Sources tab.
- Select Add from the top right.
- Drag and drop supported files or browse from your device's saved files to add your desired knowledge sources.
- Select Next.
- Give your knowledge source a title and description. This is how it displays to users in that project. Select Next.
- Select Next again to begin processing your files.
- Select Got it. Your knowledge source will display shortly.
Add media files to a project
When you add a media file at the project level, it can only be accessed by collaborators on that project, and is only applied when creating content in that project.
Media files such as videos and images make your content unique to your organization because you can portray your unique industry and working environment.
To add image, video, or audio files from your phone or mobile device:
- From the left navigation bar, select Projects.
- Locate the project you want to add a media file to. From the Show options menu, select View project.
- Select the Project media tab.
- Select Add from the top right, then Upload.
- Select Upload from your phone.
- In the pop up that displays, scan the QR code with your phone or copy the link on your phone and select the item to upload. The link is valid for 15 minutes.
- Select X to close and return to the Media library.
- If you are uploading a video or audio file, at the prompt, select whether or not you want to generate a transcript of the audio file. If you select yes:
- The transcript is stored as a knowledge source file, but is linked to the video file.
- You can use the transcript as a reference material when creating content.
- The transcript is treated as a separate asset. You can delete and manage its location separately from the video file.
- The transcript is created with time stamps so you can search and find phrases at time stamps throughout the file.
- Give your file a title and description. This is how it displays to users in that project. Select Next.
- Select Next again to begin processing your files.
- Select Got it. Your media file displays shortly. If you want to customize the image that displays in the Media Library list, you must edit the details after it finishes processing.
To add a video file to a project:
- From the left navigation bar, select Projects.
- Locate the project you want to add a media file to. From the Show options menu, select View project.
- Select the Project media tab.
- Select Add from the top right, then Upload.
- Drag and drop supported files or browse from your device's saved files to add your desired media files.
- Select Next.
- At the prompt, select whether or not you want to generate a transcript of the video file. If you select yes:
- The transcript is stored as a knowledge source file, but is linked to the video file.
- You can use the transcript as a reference material when creating content.
- The transcript is treated as a separate asset. You can delete and manage its location separately from the video file.
- The transcript is created with time stamps so you can search and find phrases at time stamps throughout the file.
- Give your file a title and description. This is how it displays to users in that project. Select Next.
- Select Next again to begin processing your files.
- Select Got it. Your media file displays shortly. If you want to customize the image that displays in the Media Library list, you must edit the details after it finishes processing.
To add an audio file to a project:
- From the left navigation bar, select Projects.
- Locate the project you want to add a media file to. From the Show options menu, select View project.
- Select the Project media tab.
- Select Add from the top right and then Upload.
- Drag and drop supported files or browse from your device's saved files to add your desired media files.
- Select Next.
- At the prompt, select whether or not you want to generate a transcript of the audio file. If you select yes:
- The transcript is stored as a knowledge source file, but is linked to the video file.
- You can use the transcript as a reference material when creating content.
- The transcript is treated as a separate asset. You can delete and manage its location separately from the video file.
- The transcript is created with time stamps so you can search and find phrases at time stamps throughout the file.
- Give your file a title and description. This is how it displays to users in that project. Select Next.
- Select Next again to begin processing your files.
- Select Got it. Your media file displays shortly. If you want to customize the image that displays in the Media Library list, you must edit the details after it finishes processing.
To upload an image file to a project:
- From the left navigation bar, select Projects.
- Locate the project you want to add a media file to. From the Show options menu, select View project.
- Select the Project media tab.
- Select Add from the top right.
- Select Upload if you want to add an image from your computer.
- Locate the image files you want to use.
- Select Next.
- Give your file a title and description. This is how it displays to users in that project. Select Next.
- Select Next again to begin processing your files.
- Select Got it. Your media file displays shortly.
To add an Unsplash image file to a project:
- From the left navigation bar, select Projects.
- Locate the project you want to add a media file to. From the Show options menu, select View project.
- Select the Project media tab.
- Select Add from the top right.
- Select Search Unsplash if you want to add an image from a third-party that is royalty free.
- Enter a search term and select Search.
- Select an image you want to upload. You can only select one at a time.
- Select Next.
- By default, you see a name and description. You can change it if you want. This is how it displays to users in that workspace.
- Select Add image. Your media file displays shortly in your image list.
Share a project
If you are an editor of a project, you can invite others to collaborate with you. The level of access you grant will determine how they can contribute to the project.
To invite collaborators to your project, select
- Locate the project in the list of projects.
- From the Show options menu
 , select Share project.
 - From the drop-down, select which type of access you want the new collaborator(s) to have, either view access or edit access.
- Search for members of your organization that you want to add, and select them from the list of results.
- Select Send Invite. Users receive an email notification that they have been added as a collaborator to the project. The email specifies if they have view or edit access.
You can add more collaborators, remove existing collaborators or update existing access levels anytime as needed.
Delete a project
If you are an editor of a project, you may delete it. In order to delete a project, you must first remove all content it contains.
To delete a project:
- From the left navigation bar, select Projects.
- Locate the project you wish to delete.
- From the Show options menu , select Delete.
- Confirm by selecting Delete project.
Rename a project
If you are an editor of a project, you may rename it.
To rename a project:
- From the left navigation bar, select Projects.
- Locate the project you wish to rename.
- From the Show options menu , select Rename.
- Give your project a new name.
- Select Rename.