Plan your Custom Journey
Before you begin creating a new custom journey, we recommend that you plan out the content to be included and whether your journey will be used in a learning program or as a certification path or both. In your plan, think about how you will group, categorize, label, and describe the journey, plus identify its location in the Percipio library. You might also want to consider how changes in the future impact learners. Having the details organized before you begin ensures the best design possible and an easy creation process.
If you are new to creating a custom journey, ask yourself the questions in the following table. Then use the checklist at the bottom to ensure you have what you need when you go to create the journey.
| Question | Reason | |||
|---|---|---|---|---|
| Is a custom journey the right solution for your business needs? |
Percipio offers the option for you to create custom channels, custom journeys, or assignments. Each can serve different purposes. For more details, see Which to use: Custom Channel, Journey, Assignment, or Learning Program? |
|||
| Do you have a title and description for your journey? |
Learners see the title and description of the journey when viewing it in Percipio. The words you use here also become keywords for searching. Use words that are meaningful to the learner. Journey title and description are required fields. Example for Akara, a fictitious company
|
|||
| Will your journey be added to a learning program? |
When you add a journey to a learning program, learners go through the content together as a cohort. We recommend that you structure your journey's tracks in a way that guides users of what to accomplish and by when throughout the program. For example: If you have a four week program, consider structuring your journey into four tracks and label each track with the week number to guide learners on what they should accomplish each week of the learning program.
|
|||
| Do you have an image created that represents your journey? |
Learners see the journey image when browsing the library and in search results. If you do not have a custom image, you can select a royalty-free one from the image gallery or use the default Percipio image. |
|||
| Have you identified the library area and subject where the journey should reside? |
The Area/Subject is where the journey lives in the library hierarchical structure. If you are using a custom area/subject, ensure it is set up before you begin creating your journey. This field is required. |
|||
| Are you allowing learners who complete the journey or its track(s) to earn a Digital Badge? | You can create custom Digital Badges that you can add to journeys and tracks. Badges provide an incentive to learners to stay engaged and complete the track and journey. To use custom Digital Badges, they must be turned on and created, then added to the journey. | |||
| Are you allowing learners who complete the journey to earn a completion certificate? |
If yes, you must enable the Completion Certificate setting under Site Settings > Site Configuration > Completion Settings > Completion Certificate and check the option: Learners earn a certificate of completion for completing this journey in step 1 when you create the journey. If no, uncheck the option: Learners earn a certificate of completion for completing this journey in step 1 when you create the journey. Learners can earn a completion certificate for both types of journeys: Aspire and Certification path. |
|||
| In what languages will learners access your custom journey? |
For each language chosen, you must provide relevant translations for titles and descriptions. You must also identify local language content you want to include in your localized track because there may not be a one-to-one mapping of English content to another language. To help you identify courses in a local language that you can add to a journey language view, you can see Find a course in a different language or use the All content listing report and filter on the English Equivalent Title column for the English title you are using. |
|||
| Do you need to create a Skillsoft Aspire Journey in another language? | Currently, Skillsoft Aspire Journeys only exist in English. To offer a Skillsoft Aspire Journey in more than one language, make a copy of it, add the languages and content you need to the copy, then hide the original. You cannot edit a Skillsoft Aspire Journey. | |||
| Have you identified all content needed and the order it should be completed? |
If you choose to create your journey with AI, you do not need to identify content to include because the AI does this for you. However, if there are specific content items you have in mind you can still add them after the AI has made its content suggestions. As you select learning content for your journey, consider the following:
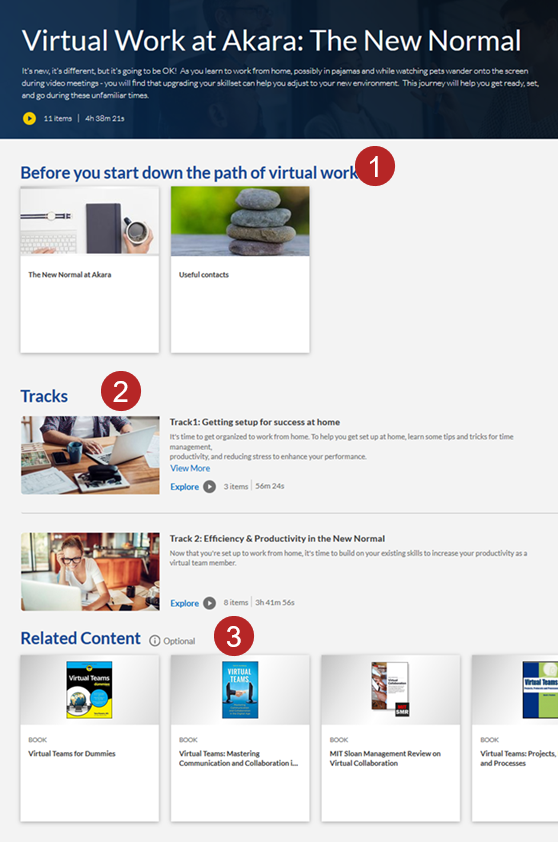
Example for Akara Journey Independent Contributor to First Line Manager:
|
|||
| How do you want your journey to display to your learners? |
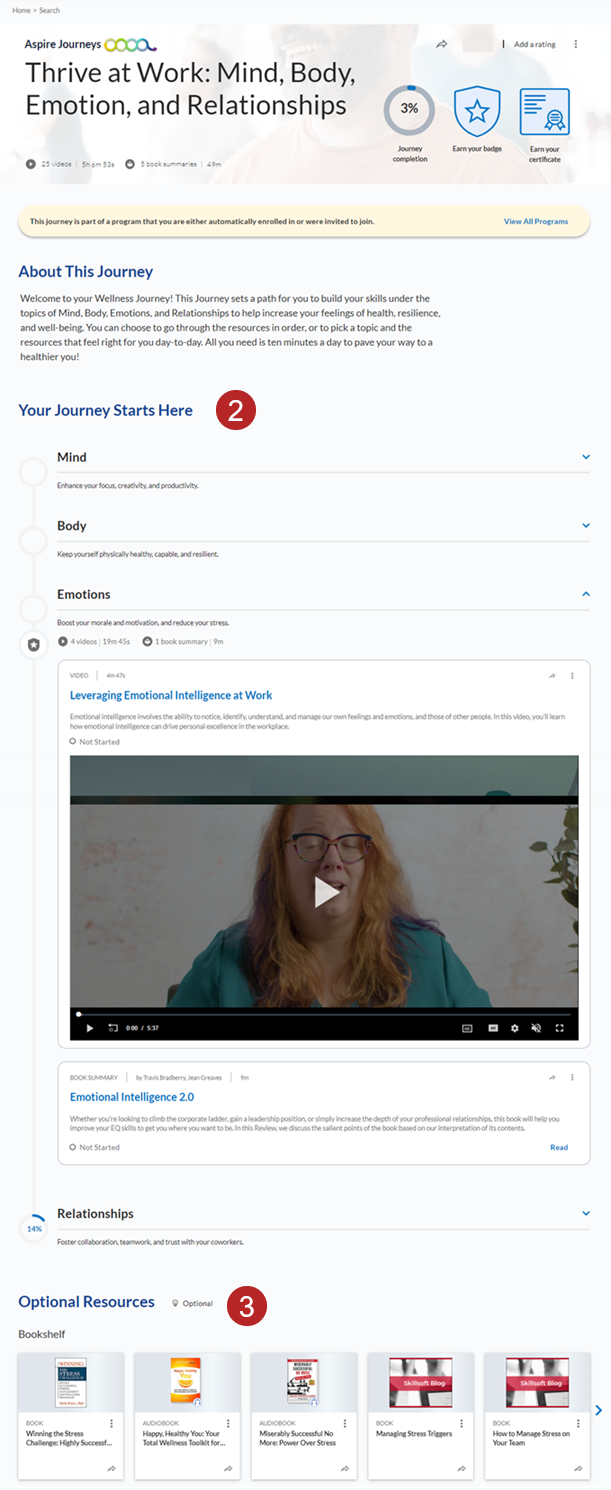
You can present journeys to learners in one of two display styles:
|
|||
| Do you want introductory content to ensure learners have the right foundation for success when moving through the journey? |
Introductory content is where you can add optional content for your learners to review before they begin the journey. As a best practice, you might consider adding introductory content to:
Example for Akara Journey Independent Contributor to First Line Manager:
If included, introductory content does not count towards the journey completion. You can group introductory content into different sections that appear as strips before the tracks in the learner view. Each section can contain 15 items. |
|||
| Do you want related content items for learners to use as a reference during or after their journey? |
You can consider adding related content if you want to provide additional resources to enhance and support your learners' knowledge as they step through the custom journey. You might add such things as reference books, corporate guidelines, or job aids. Example for Akara Journey Independent Contributor to First Line Manager:
The content you present in the related content section is not required for learner completion of the journey. You can group related content into different sections which appear as strips after the tracks in the learner view. You can have multiple sections. Each section can contain 15 items. |
|||
| Do you want your journey to only be visible to a limited number of learners? |
By default, a journey is visible to all learners. If you want it to be visible to only a select number of learners, you will need to Create a New Audience for those learners. |
|||
| Are your target learners entitled to all the content within the journey? |
Learners only see content items in a journey to which they have access. If learners do not have access to a content item within a journey through license distribution, they do not see that content item, however learners can complete the track with only items they see. |
|||
| Do you anticipate adding or removing content from the tracks or journey? | You might want to consider designing smaller tracks or journeys if you anticipate making a lot of changes to content. Once a learner completes a track or journey, it remains completed even if you add new content. See how changing a journey impacts learners. | |||
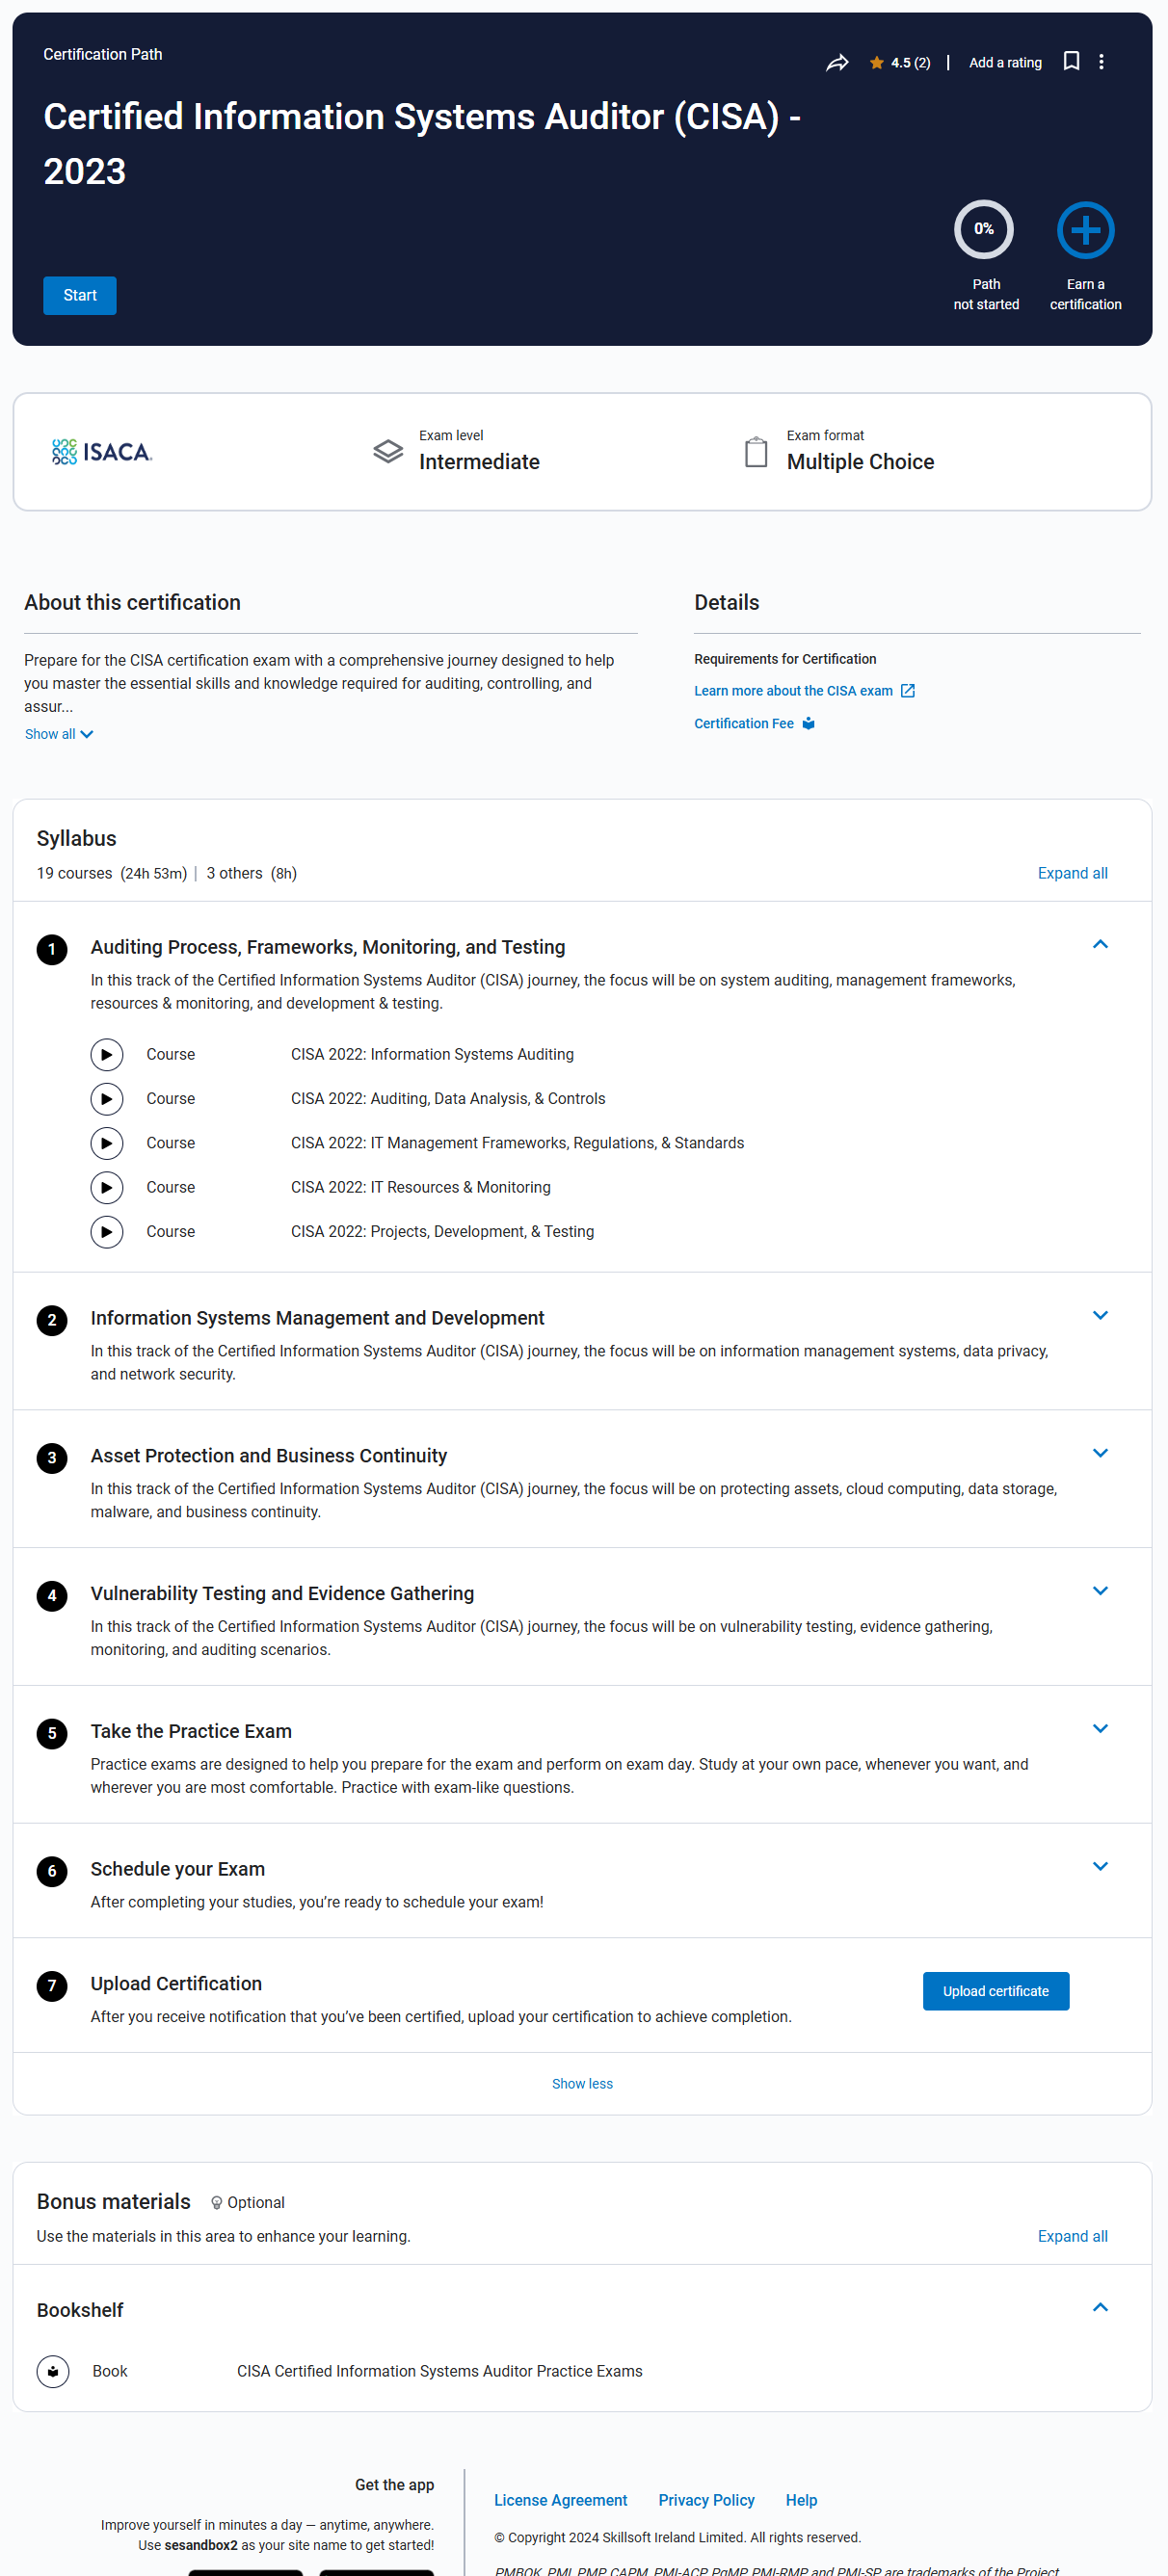
| Is this journey going to be a certification path? |
When you create a journey as a certification path, you will likely want to specify exam number, exam level, exam format, and locate an image file supporting the certification. You will also need to decide if you want the learner to upload their certification credentials in order to complete the certification path. If you want to support your learner in obtaining vouchers and scheduling their exam, it will be best to have identified the URLs that have that information so you can add it to the path. |
These are the details you need to create your journey. Items marked with an * are required. Items marked with a † are AI generated if you create a journey with AI, but you can edit them at any time:
|
|
*Area/subject | The area and subject within the library hierarchy. If using a custom area/subject, ensure you create it first. |
|
|
Language |
To offer a Skillsoft Aspire Journey in more than one language, make a copy of it, add the languages and content you need to the copy, then hide the original. You cannot edit a Skillsoft Aspire Journey. To help you identify courses in a local language that you can add to a journey language view, you can see Find a course in a different language or use the All content listing report and filter on the English Equivalent Title column for the English title you are using. |
|
|
*†Journey title | For every language needed, enter a translated title for the journey. |
|
|
*†Journey description | For every language needed, enter a translated description of what will be covered in the journey and what the learner can expect to accomplish upon completion. |
|
|
Display style | Choose how the journey displays to the learners. |
|
|
*Journey image | Add an image that will display to learners who discover the journey through search or the library. |
|
|
Custom Digital Badge | Allow learners to earn a custom Digital Badge upon completion of the track or journey. |
|
|
Introductory section | For every language needed, select any optional content needed that prepares the learner for completing the tracks. |
|
|
*†Track content | For every language and track needed, select required content the learner must complete. |
|
|
*†Track title | For every language and track needed, enter a title for each track. |
|
|
*†Track description | For every language and track needed, enter a description of what will be covered in each track and what the user can expect to accomplish upon completion. |
|
|
*Track images | Add an image that will display to learners who open the journey to browse its tracks. |
|
|
Related content | For every language needed, select any optional content needed that supports the learner after completing the tracks. |
|
|
Target audience | If you are using an audience, ensure it is created first so you can select it from the list. Ensure the audience is associated with the license pools that contain the content within the journey. |
|
|
Certification exam information | If this journey is going to be a certification path, ensure you have exam and credential information at hand. |


