Create a New One-time Assignment
You can create assignments for entire audiences and/or individual learners. Audiences are comprised of learners who have a common set of user attributes. Your assignments can be either one-time only or recurring. Specify a recurring assignment to help automate assignments you make on a regular basis. This is great for when employees are required to take regular training such as harassment or policy mandates. Recurring assignments reduce your manual workload and ensure consistent delivery of assignments to learners.
If you have many assignments to create at once, you can reach out to your Skillsoft account team who can assist with a bulk import.
There are three ways to create an assignment in more than one language when assigning either Skillsoft or compliance courses:
-
If you can easily switch between languages, one way is to change your language from the language icon drop down in the top navigation. The admin interface will change to that language. You can then specify all relevant assignment information in that language including selecting localized content.
-
A second way is to keep the interface in your language. When you create an assignment, in step 1 — Describe your assignment, select the assignment display language needed from the drop down box and make it the default language for the assignment. Add a translated title and description. In step 2, when you select to add content, first choose the associated language from the drop down list, then pick content in that language to add to the assignment. Users only see the assignment in that language even if they have a different site language selected. Learners must complete each item in the language in which it was added.
-
The third way is to use language equivalency. Keep the interface in your language and when you create an assignment, you can add multiple display languages in step 1, Describe your assignment. Enter title and descriptions in each language. Then in step 2, Add content, select Learners can complete courses in any available language. When you choose content, if it is available in another language, it is automatically added to the assignment. Learners can pick to take the content in the language that best meets their needs.
Language equivalency does not currently work for assignments made in an LMS different from the Skillsoft Platform.
To create a one-time assignment
- From the left navigation bar, select Learning > Assignments. The Assignments page displays.
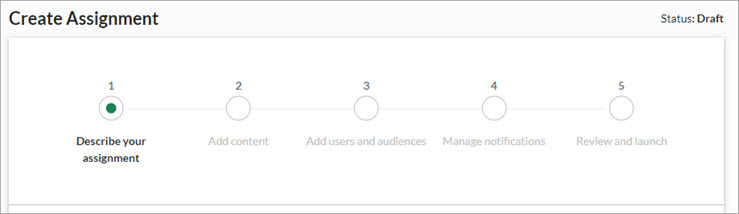
- Select New Assignment. The Create assignment workflow displays with five steps.
-
Step 1: Describe your assignment. Enter all the details describing your assignment. Ensure to select
-
After you describe your assignment, you can do one of three things:
- Cancel: closes the new assignment without saving changes.
- Save as draft: closes the new assignment, saves your changes into a Draft status, and returns you to the Assignments page. You can modify this assignment later.
- Next: Add content: saves your current changes and takes you to the next step.
-
Step 2: Add content Select how you want learners to complete the assignment and choose your content.
- After you add content, you can do one of three things:
- Cancel: closes the new assignment without saving any changes up to this point.
- Save as draft: closes the new assignment, saves your changes into a Draft status, and returns you to the Assignments page. You can modify this assignment later.
- Next: Add users and audiences: saves your current changes and takes you to the next step.
-
Step 3: Add users and audiences Site and learning admins can add users in one of two ways, by selecting them or via a bulk add using a CSV file. Learning admins can only bulk add users to assignments who are in audiences that they own. Managers can only select users or audiences, not bulk add them.
- After you add users and audiences, you can do one of three things:
- Cancel: closes the new assignment without saving any changes up to this point.
- Save as draft: closes the new assignment, saves your changes into a Draft status, and returns you to the Assignments page. You can modify this assignment later.
- Next: Manage emails: saves your current changes and takes you to the next step.
-
Step 4: Manage emails This is where you specify how you want to notify learners about the assignment. You can choose notification and reminder emails. You can also customize all emails that go prior to the assignment due date.
- After you configure and preview your emails, you can do one of three things:
- Cancel: closes the new assignment without saving any changes up to this point.
- Save as draft: closes the new assignment, saves your changes into a Draft status, and returns you to the Assignments page. You can modify this assignment later.
- Next: Review and launch: saves your current changes and takes you to the next step.
-
Step 5: Review all your settings for this assignment. Edit anything that looks amiss.
-
When you are ready, select one of the following options:
- Cancel: closes the new assignment without saving any changes up to this point.
- Save as draft: closes the new assignment, saves your changes into a Draft status, and returns you to the Assignments page. You can modify this assignment later.
- Launch assignment: Places the assignment into one of the following statuses:
- If the Start date is today, the assignment is placed in an In Progress status and the assignment is immediately available to your learners. The email with the assignment details sends at the date and time you specified in step 9. Modifications to the assignment content cannot be made, but you can add a user to the assignment.
- If the Start date is in the future, the assignment is placed in a Scheduled status and the email, if enabled, sends at the date and time you specified in step 9. You can make modifications to all aspects of the assignment until the Start date.
Assignments with the same due date are listed by when the assignment is launched, in ascending order, on a learner's assignments page and on the home page.
Step 1: Describe Assignment
In this step for creating an assignment you specify all the meta data associated with the assignment including title, language, description, objectives, and whether it is a one-time only or recurring assignment. The following fields are available:
- Select display language: If you are offering this assignment in multiple languages, using language equivalency, select all languages that apply. Of all your selected languages, choose the default language learners see if their site language does not match any of the languages you selected. For each language you select, you must also specify a translated title and description. Also, ensure you select Learners can complete courses in any available language when adding content in Step 2.
- If you are not using language equivalency and are just creating an assignment in one language, choose the display language from the drop down and make it the default language. Then, when selecting content in Step 2, first choose the language, then select content in that language. Learners, no matter their site language, will only see the assignment in the assignment language.
- Title: Use a convention that makes sense to learners and that is easy for you to find in the Assignment list.
- Assignment type: Specify if the assignment is to be one-time only or recurring. The default option is one time. The option you select here determines assignment configuration options around due dates and retake options. Select One-time.
-
Business objective:Using the drop-down list, associate the business reason as to why you are making the assignment.
This association is used to build alignment metrics for your organization. You can select from 10 Skillsoft objectives and up to 10 custom objectives. If you do not yet have 10 custom objectives defined, you can create a new one by selecting Create new from the drop down list as long as you are a user with a site or domain admin role. Any custom business objectives you create here also show on the Business Objective list page. These metrics are available from the Assignments dashboard.
Available business objectives include:
- Cost control: Formal and informal efforts made by managers to monitor, evaluate, and reduce expenditures.
- Customer satisfaction: Efforts focused on increasing the number of customers whose reported experience with a firm, its products, or its services exceeds specified satisfaction goals.
- Employee engagement: Quality and quantity of discretionary effort employees are willing to apply to the organization and its goals.
- Revenue Growth: Efforts designed to increase the revenue an organization derives from its products and services to customers.
- Innovation: The creation and capture of new value in the marketplace, including new products and services
- Operational effectiveness: Practices that enable the organization to better utilize its operations resources and better implement its processes and procedures
- Quality: Improvement in the quality of products and services produced and delivered by the organization
- Workforce productivity: Amount and impact of work delivered by an employee or group of employees in a specific period of time.
- Legal compliance and risk mitigation:Effort to remain compliant with legal requirements.
- Workplace safety and health compliance: Effort to remain compliant with safety and health regulations.
- Assigned by: This is the name your learners see as the person who made the assignment. By default your name is selected. Select the other radio button and enter another name if they should see something else like perhaps a department or a leader's name.
- Category: Using the drop-down list, select the category for the assignment you are creating.
Available categories include:
- Certification: Use when the goal is to help learners earn a certification.
- Compliance: Use when the goal is focused on compliance.
- Cultural: Use when the goal is to promote or inform learners about company culture.
- Leadership: Use when the goal is to advance and encourage growth for managers and leaders.
- Onboarding: Use when the goal is to facilitate new employe training and orientation.
- Upskilling: Use when the goal is to help learners acquire or advance a skill set.
- Other: Use when none of the other available types apply.
- Description: This displays to your learners in the assignment details. This also helps other admins understand why the assignment was made.
- Duration: If you selected One-time as the Assignment type, choose by when learners must complete the assignment. You can either choose Specific date or Days to complete.
Specific date
If you add a user or audience to this assignment while it is in an In Progress status, those learners must complete the assignment by the specified End date. If you want all users to have the same number of days to complete an assignment, regardless of when you add them to it, use the Number of days option.
Start and end dates are in GMT.
- Enter a Start date.
- Enter an End date.
Note: If a learner is added to an audience with an assignment that has a specific end date, and that end date has passed, the learner will receive the assignment as overdue in their assignment list and if initial notifications are turned on, their first notification is an overdue notification even if overdue notifications are turned off. To avoid this scenario, you can change the end date or archive the assignment.Number of days
If you add a user to an assignment (or if you add a user to an audience with the assignment), they receive the assignment with a relative due date.
Start and end dates are in GMT.
- Enter a Start date.
- Enter the number of Days to complete.
Note: Days to complete is calculated for each user based on the day the user is added to the assignment or to the assigned audience. For example, if you create an assignment October 1 and set the Days to complete to 15, the due date for the users and audiences is October 15. If a new user is added to the audience on October 5 (when the assignment has a status of In Progress), their due date is October 20.
-
Manage access: By default, site admins have access to manage all assignments. If you are a Learning admin or Manager who wants other admins who have the assignment management permission to help manage or collaborate on your assignment, you can give them access. Use this feature when you might be on an extended leave, or just want to pass maintenance of an assignment you created to another. To add collaborators at any time, under Permissions, you can either choose:
- All admins: When you select all admins, any admin with permissions to view assignments sees your assignment in their list and can manage it (including editing and deleting).
- Limited access: When you select limited access, you then must choose which admins see your assignment and can manage it (including editing and deleting). Select Add admins, then search for Skillsoft Platform users with the appropriate permissions and add them.
Step 2: Add Content
Before you add content, select how you want the content to behave within the assignment. You have different options depending on whether you selected one time or recurring assignment:
-
Learners can complete courses in any available language: This applies to both one time and recurring assignments. If you want to allow learners to complete a Skillsoft or compliance course in the language that best works for them, select this option. When you select this option, you choose the one course in the language you know and the platform includes in the assignment all available languages in which this course is available. Learners can then choose the language they want to take the course in. Assignment reports show which language equivalent course the learner completed. If you select this option when creating the assignment, you cannot edit the assignment and turn it off when the assignment is in progress.
-
Allow completion through equivalent content: This applies to both one-time and recurring assignments. If you set up a content relationship and you select this option, you let learners choose which of the equivalent items from the group they can take to earn a completion. Assignment reports show which equivalent item the learner completed. If you select this option when creating the assignment, you cannot edit the assignment and turn it off when the assignment is in progress. A couple of things to note regarding equivalent content, given that Course A and Course B are in a content relationship group (they are equivalent):
- If you assign Course A and learner completes Course B, no matter if they launched from the assignment or not, the completion counts towards the assignment completion and the learner is not required to complete Course A.
- If you grant an override or waiver for Course B, and Course A is assigned, the learner receives completion credit for that course within the assignment.
- If the assignment does not require a restart of Course A for completion and a learner previously completed the equivalent Course B prior to the assignment, then they receive completion credit for the assigned Course A.
- If the assignment requires a restart of Course A, it will also require a restart of equivalent content for completion.
-
Content items must be completed in the display order specified: This applies to both one time and recurring assignments. To enforce a specific order of content, select this option. When you select this option, learners cannot access content out of the specified order. They must complete each piece of content before the next, in accordance with the set completion criteria. See Completion Settings for more information about setting course completion criteria. See Complete your Content for each asset type's specific completion criteria requirements.
- Require learners to complete all courses from the beginning:This setting applies to one time assignments only. When unselected, previous course completions count toward assignment completion.When selected, all learners must restart from the beginning any previously completed online courses that are part of the assignment. Previous course completions will not count towards the assignment completion when this option is selected. Online courses include Skillsoft online courses, custom courses in AICC or SCORM formats, and compliance courses. It does not include live courses or live events.
- This setting does not apply to other content types within the assignment. If learners have any progress or completions for other content types such as journeys, books, or videos, the learner's previous progress or completion does count toward the assignment completion.
- You cannot change this setting after you launch the assignment.
- If you choose to reset course progress, that setting takes precedence over this one.
When you are ready, you can add content:
- Select Add content.Note: When choosing content to add to an assignment, you can choose content from all license pools installed on your site. If your users do not have access to a content item because their audience is not associated with the appropriate license pool, they see the item in the assignment and cannot launch it. They also cannot complete the assignment.
To ensure recurring assignments actually recur and restart for the learner, they must contain content that can be restarted, such as Skillsoft and custom courses. If your recurring assignment only contains content such as videos, a journey, or a book that cannot be restarted, after the learner completes the first occurrence, subsequent occurrences will always be considered complete without a learner retaking the content.
- From the Language dropdown, select the language of the content you want to add to the assignment. Only content in that language displays when you search. Be careful, because you can change the language and add content items in another language to the assignment. For example, you can add an English book, a Spanish video, a German course, and a French audiobook to one assignment and the learner must complete them all to achieve assignment completion. If a learner is not familiar with all languages, they will not be able to complete the assignment.
- In the search field, enter keywords or titles of the content you want to include, then select the magnifying glass
 or press Enter.
 - Select
 next to each piece of content you want to add to the assignment. If a piece of content is part of a content relationship or equivalency group, you see a note indicating that. If you chose to allow learners to complete through equivalent content, they will be able to select any item from the group to achieve completion.
 -
Repeat these steps until you've added all the content. You can add a maximum of 100 total items.
Note: You can add instructor-led training (live course) to an assignment. The learner must register for the class that best meets their schedule, attend the class, and achieve a passing score to achieve completion. -
Select Add Content.
-
Drag and drop the content into the order you want it presented to the learner. Alternatively, use the arrow buttons to move content up or down the list.
If you selected the Content items must be completed in the display order specified option, learners must complete each item in the order presented here.
If you selected Allow completion through equivalent content, you see a notation below the course title indicating how many items are available for this course or file.
If you selected Learners can complete courses in any available language, you see a notation below the course title indicating how many languages are available for this course or file.
Step 3: Add users and audiences
To select users or audiences:
- Select Add users and audiences.
- In the search field, enter the name of an audience or individual learner.
- Locate the audience(s) or user(s) you want to assign the content to and select . If you select audiences instead of individual users, then users automatically get added to and removed from an assignment based on the values in the user attribute set in the audience.
- Repeat these steps until you've added all users and/or audiences.
- Select Done. Note: If you remove a learner from an audience that has an assignment and the learner has not completed the assignment, the assignment no longer displays for the learner in their assignment list and they no longer show in assignment reports. If you remove a learner from an audience that has an assignment and the learner has completed the assignment, the assignment remains in their assignment list and their completion remains in assignment reports.
To bulk add individual users using a CSV file:
- Select Bulk add individual users.
- Select to Download template CSV file.
The template contains three columns:
- email: the email of the user as specified in the Skillsoft Platform user record.
- loginName: the Login Name of the user as specified in the Skillsoft Platform user record.
- externalUserId: The User ID used to identify a user inside the platform.
- Include user data in one of the three columns and remove the other two unused columns.
- Save and select the one-column CSV file for import.
- Select Add user(s).
If a learning admin attempts to add a user who is not in one of their owned audiences or who does not have a Skillsoft Platform user account, they see an error message: User unavailable for bulk add.
Step 4: Manage emails
From the Manage emails tab, select and configure the frequency of the two types of emails you want to send.
If a learner has content items completed prior to getting the assignment, and the assignment is not configured to restart, the learner will not get notifications if the completed items complete the assignment.
- Notification email: turn on this option if you want to send a notification email to learners letting them know they now have an assignment.
- When you first launch an assignment, you can choose when the system sends this email by specifying a date and time. The day and time you specify is in your time zone, not the learners. There may be a delay from when the system sends the email and when the learners receive it depending on network traffic and when the email lands in the email queue. These emails get sent every 30 minutes at the top and bottom of the hour.
- If learners get added after the initial launch, they automatically get sent this email within 30 minutes of being added to the assignment. Depending on network traffic, the learner may not receive it within 30 minutes. If the assignment is automatically marked complete at the time it is issued, the platform does not send any assignment notification or reminder emails.
- Turn off this setting if you don't want to send the notification email.
- This email uses the Assignment coming due email template.
- You can add a custom subject, header text, and an introductory message to this email.
- If you have this setting on, and the learner gets added to an assignment with settings that make the assignment immediately overdue for the learner, then the learner does not get this initial notification, they immediately get the overdue notification even if overdue emails are turned off.
- Reminder emails: You can turn on this option if you want learners to receive emails after the notification email reminding them that they have an assignment. If a learner completes the assignment, they do not receive the reminder emails. You can configure how often these emails go to learners.
- There are three types of reminder emails that you can turn on:
- Initial reminders: These emails go out after the notification email to remind learners they have an assignment. You can configure the frequency of this email.
- Due date approaching emails: These emails go out based on the criteria you set and replace the initial reminders. You can choose to copy a learner's manager on these emails by turning on CC managers on approaching due date emails switch. The manager who receives the email is the one specified in the Direct manager attribute for that learner. You can also choose to send this email on the actual due date of the assignment.
- After due date: These emails go out if the learner has not completed the assignment by the due date. They are sent based on the criteria you set and replace due date approaching emails. You can choose to copy a learner's manager on these emails by turning on CC managers on overdue assignment emails switch. The manager who receives the email is the one specified in the Direct manager attribute for that learner. If you turn off the After due date reminders, but have initial notifications turned on, and the learner gets an assignment that is immediately overdue, they receive an email notification that says they are overdue instead of saying that they have an assignment.
- The default setting for reminder emails is set from the Default email reminders setting if enabled. You can override the default reminders.
- You have three options at this point:
- If the reminders are off and you want them on, select On.
- If the reminders are on and you want them off, select Off.
- If the assignment reminders are on and you want to modify any default settings, make any adjustments to the three segments of reminders: Initial, Due date approaching, After due date. You can choose to turn off any of the three segments of reminders by deselecting the check box at the top of that section. If you make changes that you don't like, you can select Restore to defaults to go back to the recommended frequencies.
- Changes you make to reminders are saved independent of the default email reminders. Any changes you make to the default email reminder schedule after setting up this assignment, does not impact your saved schedule changes for this assignment.
- If you set the starting number of days for the Due date approaching emails to be longer than the length of the assignment, the platform counts back that number of days to calculate the starting point for sending these reminder emails.
- If you make schedule changes to an in-progress assignment, reminders follow the criteria you set and only go to users who haven't completed the assignment.
- Learners get the reminders until either they complete the assignment, you turn the reminders off, or you cancel the assignment.
- Based on criteria set, reminder emails trigger daily for sending at 12:01 a.m. GMT. Network traffic determines when the learner actually receives it on that day.
- There are three types of reminder emails that you can turn on:
From the Customize and preview emails tab, you can:
- Customize and preview emails sent prior to the due date
- By default, learners receive the same email for all notifications and reminders sent before the assignment due date, and a different email for all reminders sent after the due date. For email template details, see assignment emails.
- If you add customizations, they are also used in the one-off email reminders.
- Add a custom Subject, Header text, and Introductory text and see how it displays to learners.
- To edit email text for reminders coming due, see edit assignments.
- Preview emails sent after the due date
- At this time you cannot edit emails that go out for assignments that are past due.
- If you send one-off email reminders after the assignment due date, learners receive this template.